
Building a hands-on cybersecurity and networking lab is one of the best ways to master enterprise firewall management. Fortinet’s FortiGate firewall is widely used in enterprise networks worldwide, and Fortinet offers a free permanent trial license for virtual machines (VMs) with basic lab capabilities.
In this step-by-step tutorial, you will learn how to build a fully functional FortiGate VM lab from scratch using VMware Workstation. We will also connect an Ubuntu virtual machine as a LAN client to route traffic through the firewall and verify real-time logs.
Prerequisites & Lab Overview#
Before getting started, make sure your host machine meets the following requirements:
- Host OS: Windows 10/11, Linux
- RAM: Minimum 8 GB (16 GB recommended).
Step 1: Download and Install VMware Workstation Pro#
- Go to the Broadcom Support Portal at https://support.broadcom.com
- Log in to your Broadcom account (or register a free account if you don’t have one).
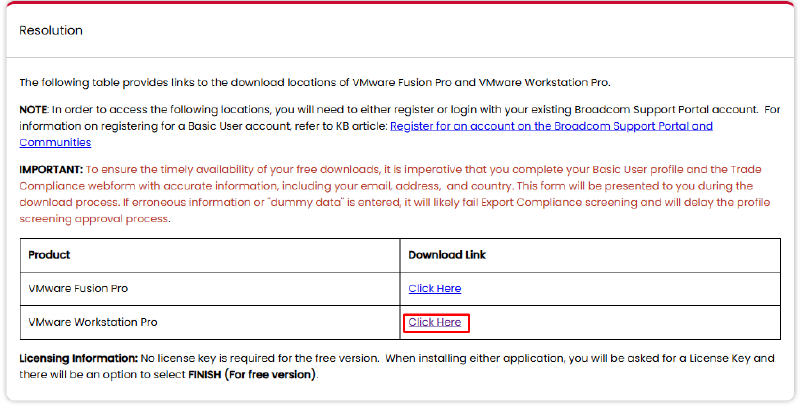
- Go to the following Broadcom site: https://knowledge.broadcom.com/external/article/368667/download-and-license-vmware-desktop-hype.html and click on the VMware Workstation Pro free link.
- Select the Windows or Linux download package matching your operating system.
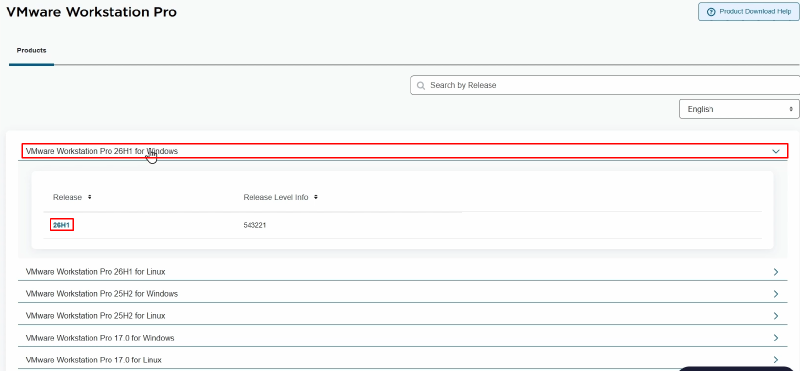
- Accept the terms and conditions and complete the download.
- Run the installer (
.exefile), accept the default options, and complete the installation wizard.
Step 2: Download FortiGate VM Image#
- Visit the official Fortinet Support Portal at https://support.fortinet.com
- Register for a free account (
Create Account) or log in with your credentials (Log in).
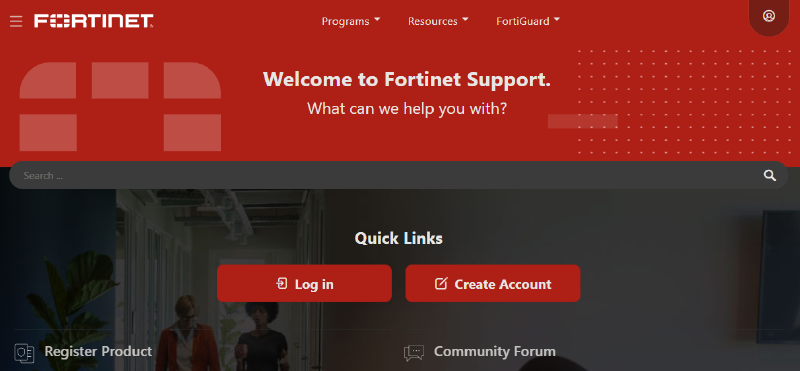
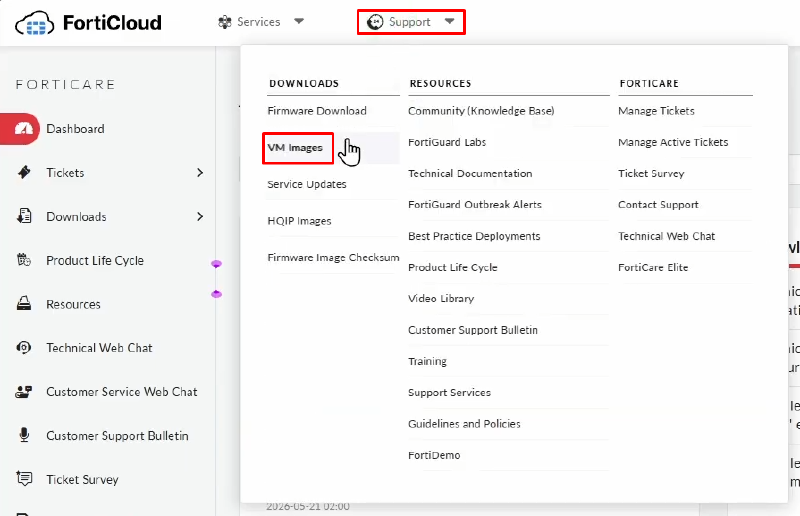
- Once you’re logged in, in the top menu, navigate to
Support > VM Images
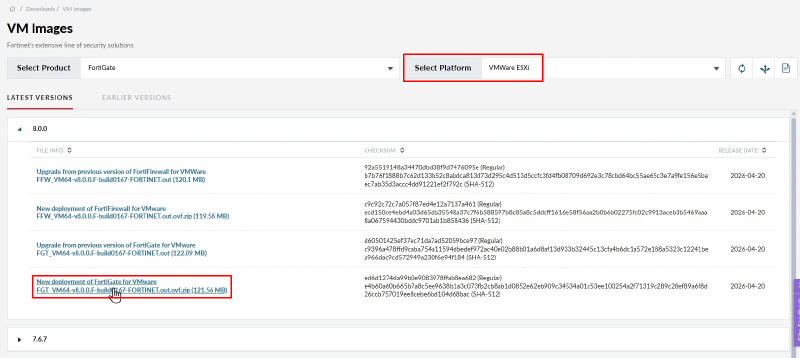
- Under Platform, select VMware ESXi.
- Choose the desired firmware version (e.g., Firmware 7.x or 8.x) and select the
New Deployment of FortiGateoption to download the OVF file.
Step 3: Import FortiGate OVF File into VMware#
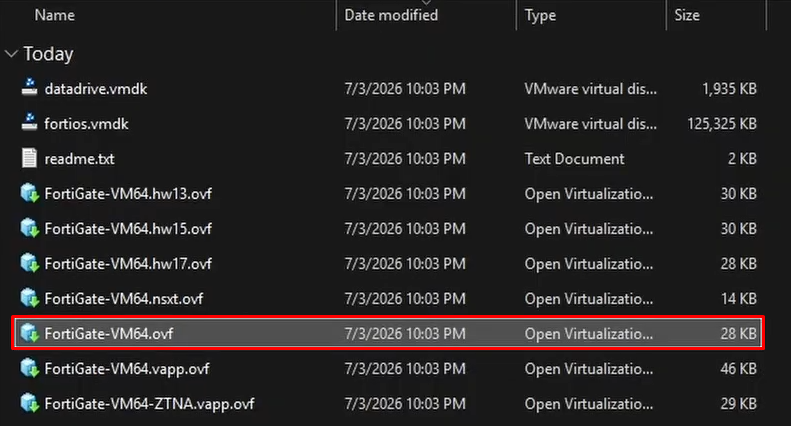
- Extract the downloaded FortiGate ZIP package to a local folder. Inside, you will find
.ovfand.vmdkfiles. - Right-click the
FortiGate-VM64file with VMware Workstation Pro.
- Accept the the terms of the license.
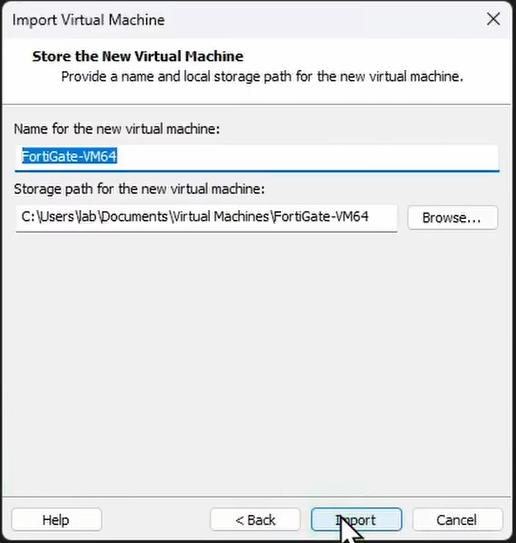
- Name your VM and click on
Import.
Step 4: Configure Virtual Networks in VMware#
Before powering on the FortiGate VM, set up the virtual adapters:
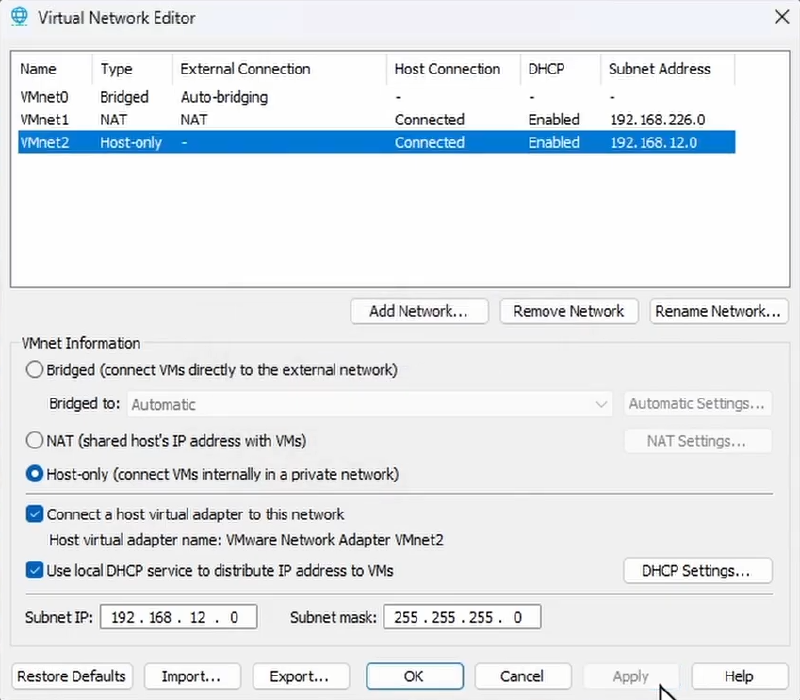
- In VMware Workstation, go to
Edit > Virtual Network Editor. - Click Change Settings (requires administrative privileges).
- Create the following two networks:
- VMnet1 (NAT): Allows connected VMs to access the host internet connection.
- VMnet2 (Host-Only): An isolated network shared between VMs and the host.
- Select your FortiGate VM and click
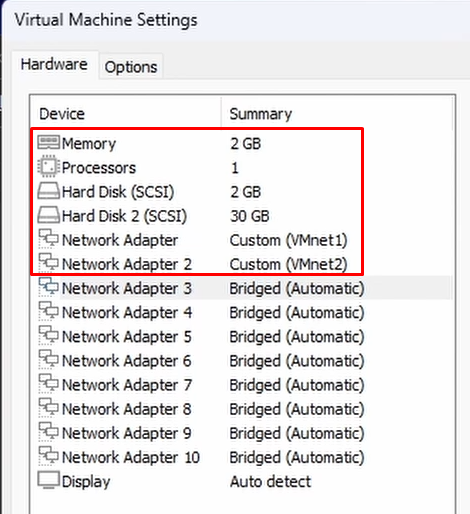
Edit virtual machine settings:- CPU & RAM: Keep the defaults (1 vCPU, 2 GB RAM). The FortiGate Trial license supports a maximum of 1 vCPU and 2 GB RAM.
- Network Adapter 1 (Port 1): Set to NAT (or custom
VMnet1). - Network Adapter 2 (Port 2): Set to Host-Only (or custom
VMnet2).
- Click
OKto save changes.
Step 5: Initial Setup & Free Trial License Activation (CLI)#
- Power on the FortiGate VM. Allow it to complete the initial boot process.
- At the login prompt, enter:
- Username:
admin - Password: (Leave blank, press Enter)
- Username:
- Set a new password when prompted
- Still on FortiGate’s CLI, verify an IP address was assigned to port1 via DHCP using the following command:
# show system interface ?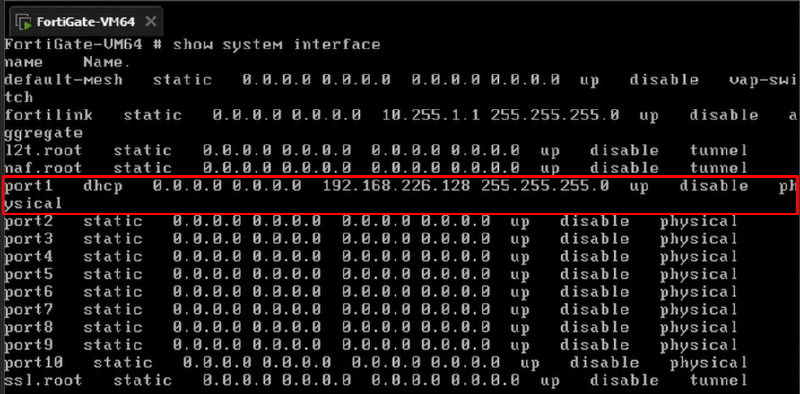
You can also test internet connectivity and DNS resolution from the FortiGate using a ping command:
# execute ping google.com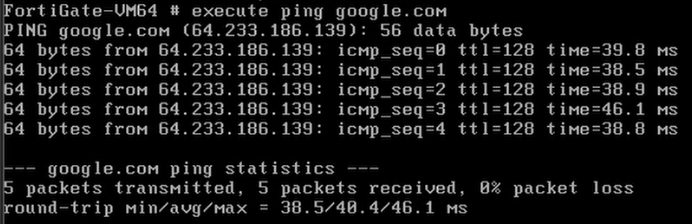
- To enable all web management and firewall features, activate the trial license using your Fortinet Support credentials:
# execute vm-license-options account-id your_email@example.com
# execute vm-license-options account-password YourPassword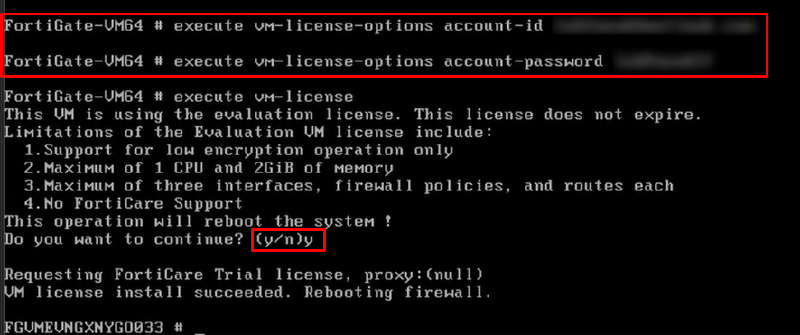
Confirm the prompt to reboot the virtual machine with y key.
Step 6: Configure Interfaces & Firewall Policy via Web GUI#
- Open your web browser on the host machine and navigate to
https://<FortiGate-Port1-IP>. - Accept the self-signed SSL certificate warning and log in as
adminwith the password you previously set.
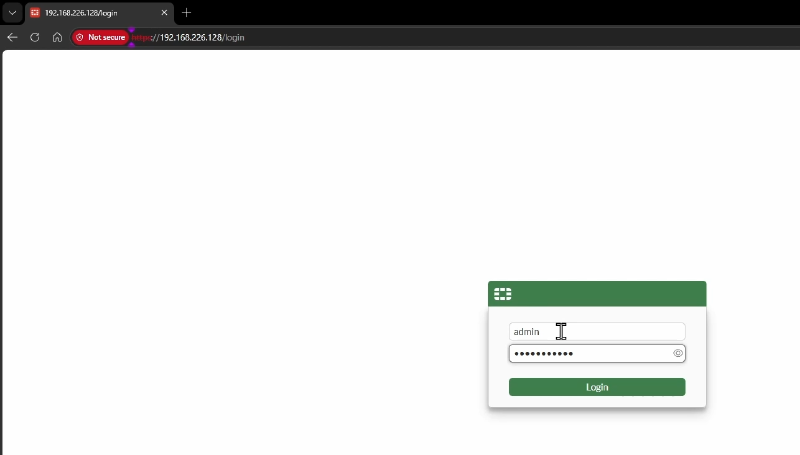
- Configure Network Interfaces:
- Go to
Network > Interfaces. - Double-click
port1:- Set Alias to
WAN. - Keep Addressing mode as DHCP.
- Set Alias to
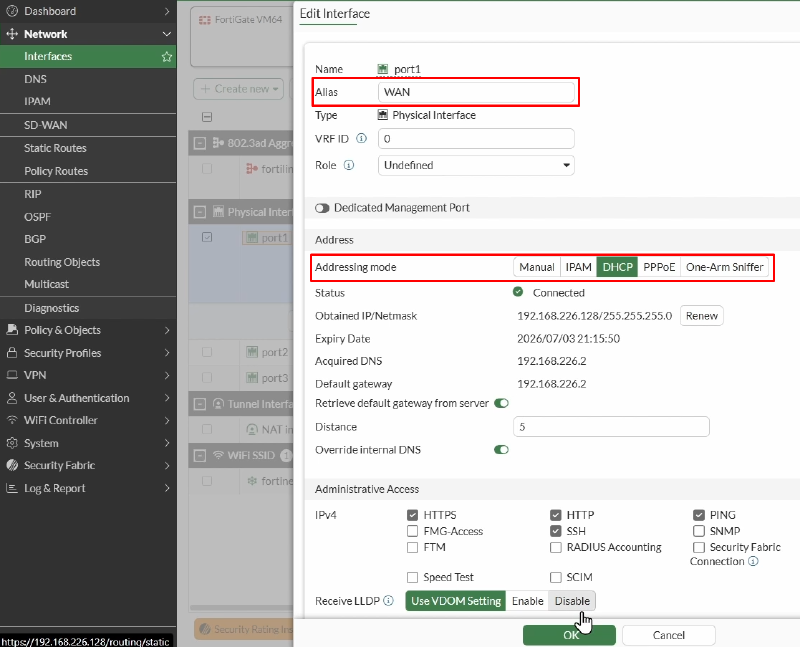
- Double-click
port2:- Set Alias to
LAN. - Set Addressing mode to
Manual. - Assign an IP address in your Host-Only network subnet (e.g.,
192.168.12.128/24). - Enable
PINGunder Administrative Access.
- Set Alias to
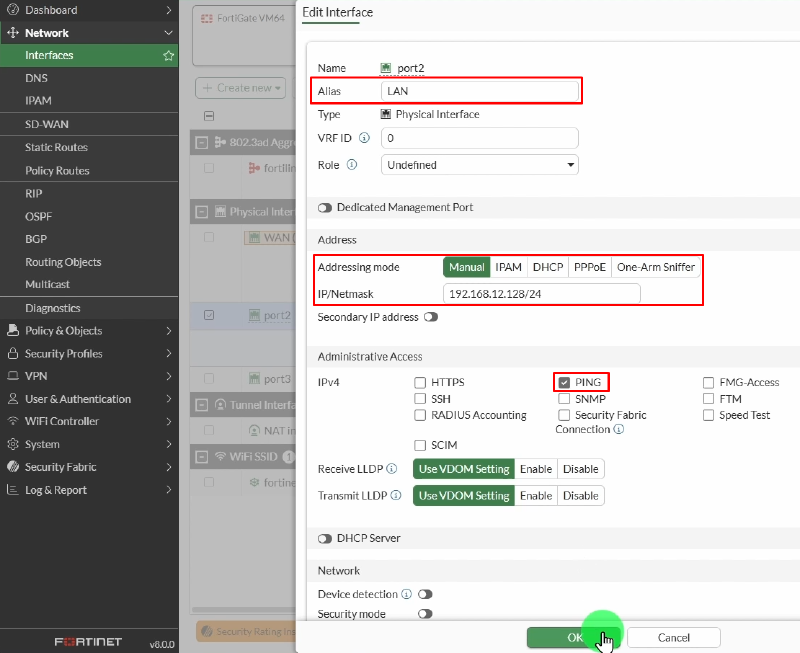
- Create a LAN-to-WAN Firewall Policy:
- Navigate to
Policy & Objects > Firewall Policy. - Click
Create New:- Name:
LAN to WAN - Incoming Interface:
LAN (port2) - Outgoing Interface:
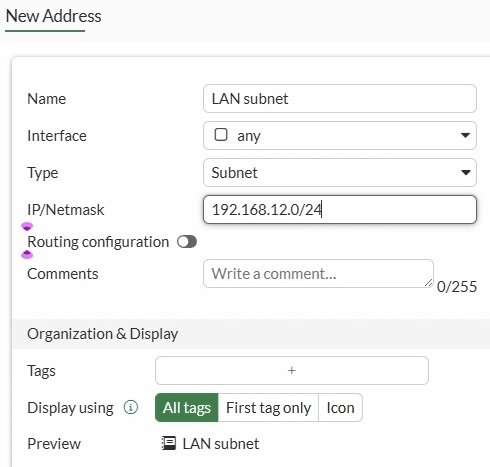
WAN (port1) - Source: Create a LAN subnet “Address” object (e.g.,
192.168.12.0/24). - Destination:
all - Service:
ALL - NAT: Enabled.
- Log Allowed Traffic: All Sessions.
- Name:
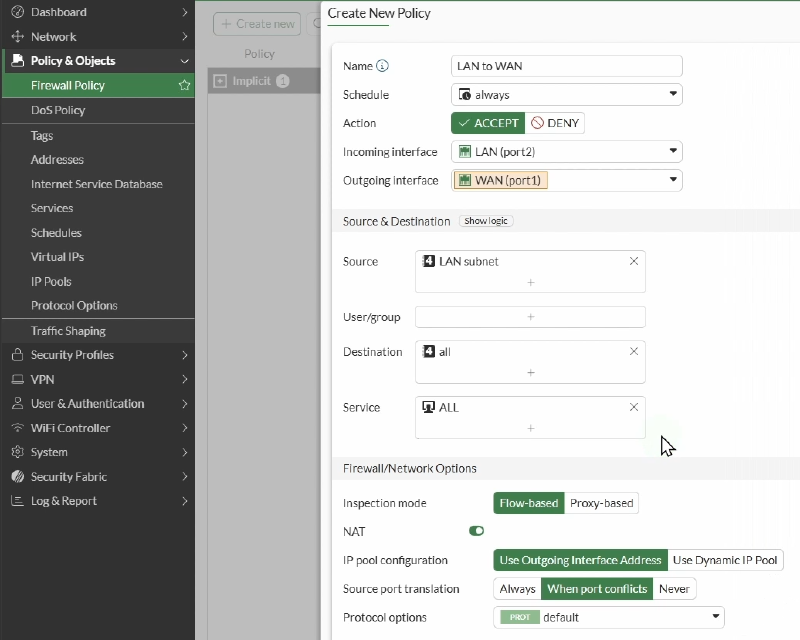
LAN Subnet Address object:
- Click
OKto save and activate the policy.

Step 7: Connect a Client & Test Connectivity#
In this case we will use an Ubuntu VM as the client for testing connectivity through the firewall. However, you can use a different guest VM for doing your tests.
- Launch your guest VM in VMware. In this case we I’ll use an Ubuntu VM.
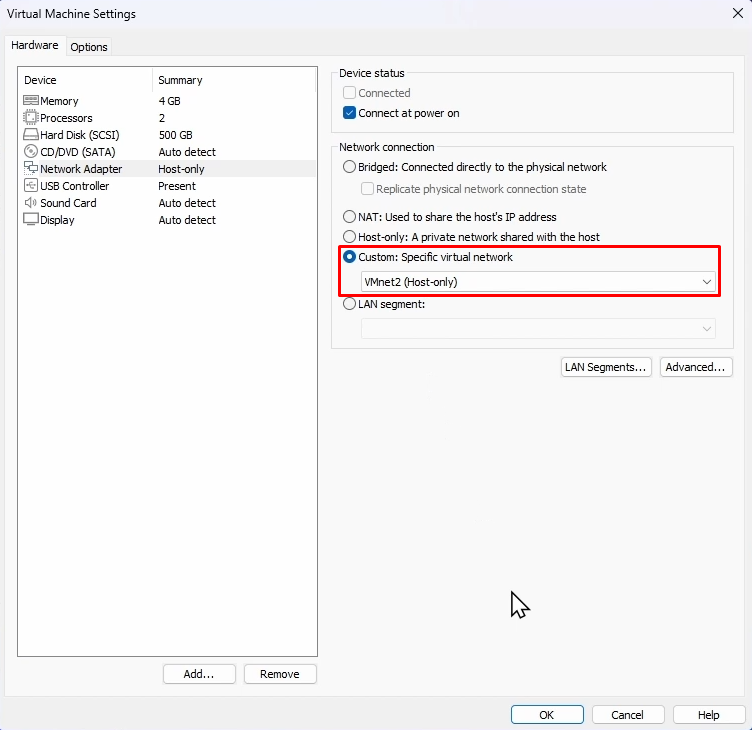
- In VMware VM settings, assign its network adapter to the Host-Only network (VMnet2).
- Boot the Ubuntu VM, open a terminal, and configure the following:
- IP Address: an available IP on the Host-Only subnet (e.g.,
192.168.12.129). It may already be assigned since the Host-only network has a DHCP server. Check the assigned IP address:
# ip -br a- Default Gateway: use FortiGate LAN interface IP (
192.168.12.128)
# sudo ip route add default via 192.168.12.128- DNS Server: edit the
resolv.conffile and define the DNS server to8.8.8.8
# sudo nano /etc/resolv.conf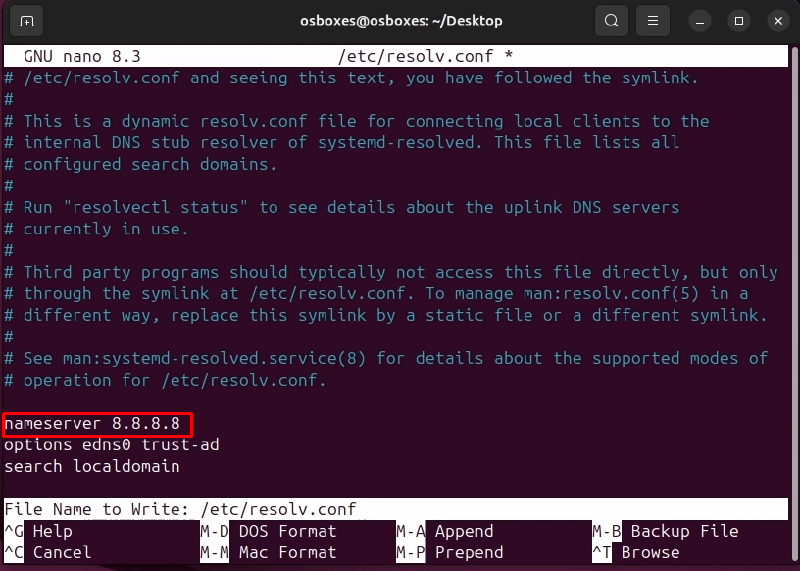
- Test connectivity from the Ubuntu terminal. Confirm internet connectivity and name resolution is working/
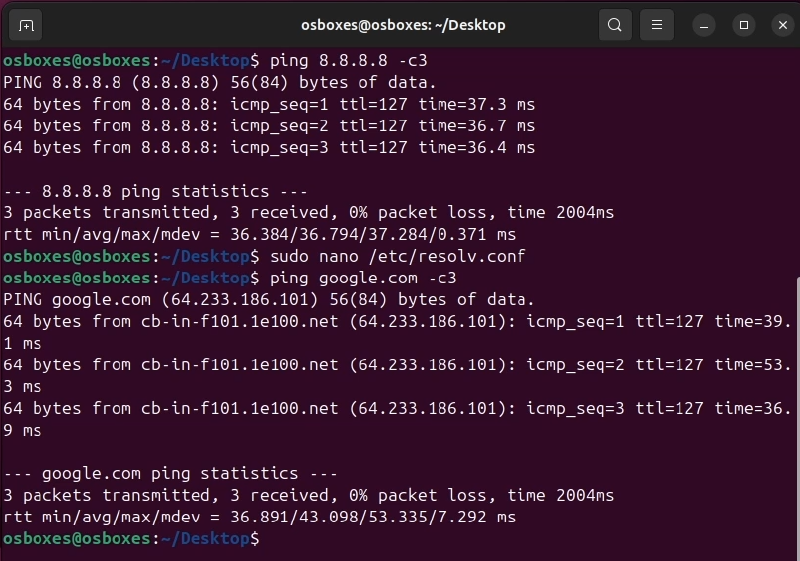
You can also connect to the browser from the Ubuntu VM and connect to some sites.
Step 8: Verify Traffic Logs on FortiGate#
- Return to the FortiGate Web GUI.
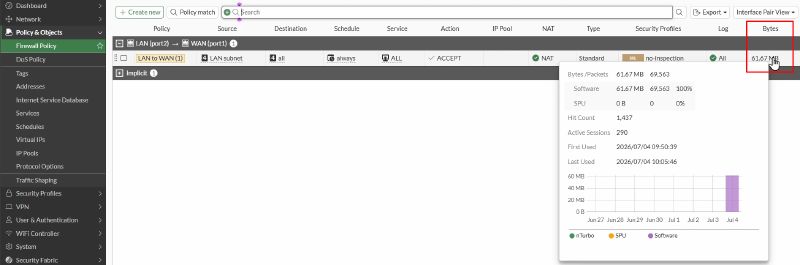
- Inside
Policy & Objects > Firewall Policyyou can check there is matching bytes of traffic:
- Now go to
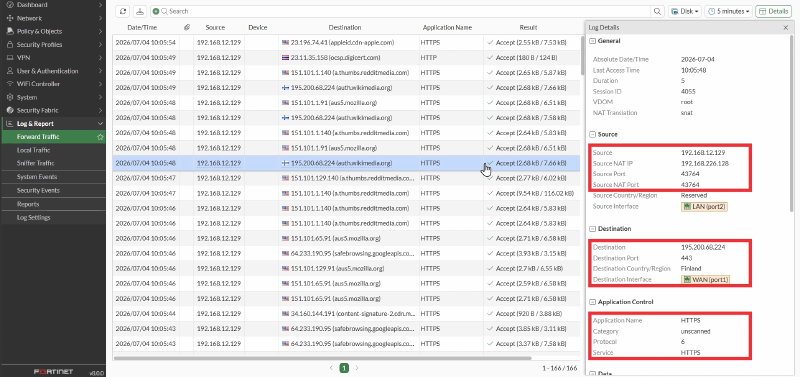
Log & Report > Forward Traffic.
You will see active log entries showing traffic originating from your Ubuntu VM IP, routed through FortiGate, NAT applied, and allowed out to the internet via the “LAN to WAN” policy:
Watch the Video Tutorial#
For a visual step-by-step walk-through, watch the complete video guide on YouTube: