
FortiGate Virtual IPs (VIPs) can be used to publish internal services through an external IP address. In addition to translating the destination IP address, aka Destination NAT or DNAT, a VIP can also perform port forwarding, allowing an internal service to be exposed through a different external port.
In this tutorial, we will configure a FortiGate to publish an internal web server using the IP address configured directly on the FortiGate WAN interface.
By the end of the configuration, both external users and LAN users will be able to access the same web server using the same public IP address and port.
Lab Topology#
The lab consists of a FortiGate with three interfaces:
- WAN (port1):
203.0.113.5/24 - LAN (port2):
192.168.10.5/24 - DMZ (port3):
192.168.20.5/24
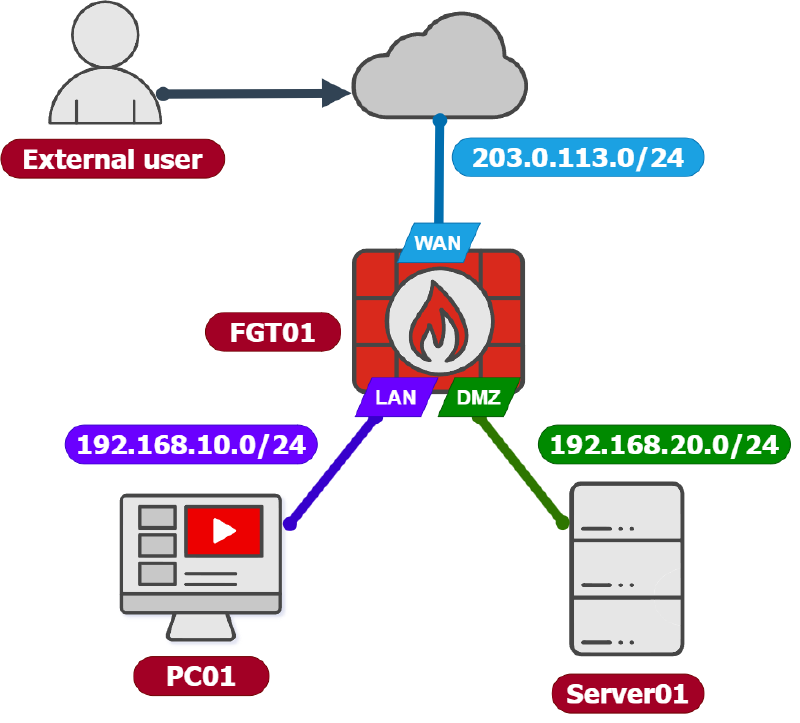
The LAN contains PC01, while the DMZ contains the internal web server Server01.
The desired publication is:
203.0.113.5:8080 ---> 192.168.20.11:80In other words, users connecting to the FortiGate’s WAN IP on TCP port 8080 will be translated to the internal web server on TCP port 80.
1. Create the FortiGate VIP#
The first step is to create a Virtual IP that defines the destination NAT translation.
Go to: Policy & Objects > Virtual IPs. Select Create New.
Configure the VIP as follows:
| Setting | Value |
|---|---|
| Name | VIP Web Server |
| Interface | any or port1 |
| Type | Static NAT |
| External IP | 203.0.113.5 |
| Mapped IP | 192.168.20.11 |
| Port Forwarding | Enabled |
| Protocol | TCP |
| External Service Port | 8080 |
| Mapped Port | 80 |
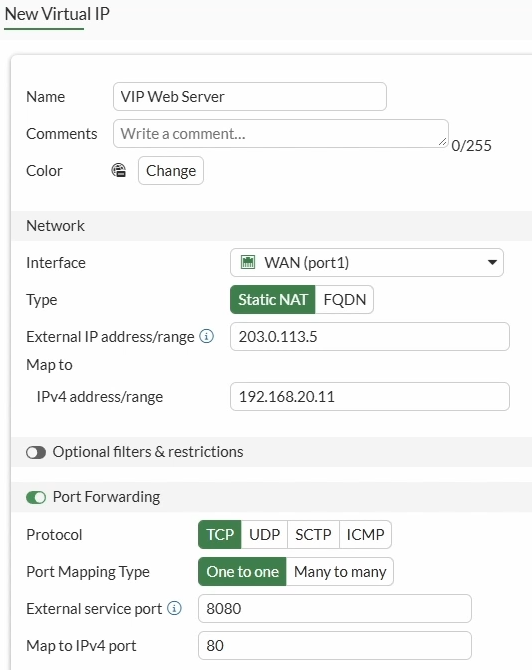
For this particular scenario, the VIP interface can be configured as any or WAN (port1). The important detail is that the external IP address 203.0.113.5 is already configured directly on the FortiGate’s WAN interface.
Port forwarding is required because the external port and internal port are different. The external service uses TCP/8080, while the web server listens on TCP/80.
FortiGate therefore performs both:
- Destination IP translation (aka Destination NAT or DNAT)
- Destination port translation
At this point, the destination NAT translation has been defined. However, the VIP alone does not permit the traffic. A firewall policy is also required.
2. Create the WAN-to-DMZ Firewall Policy#
Go to: Policy & Objects > Firewall Policy. Select Create New.
Configure the policy as follows:
| Setting | Value |
|---|---|
| Name | External Web Server Access |
| Action | Accept |
| Incoming Interface | port1 |
| Outgoing Interface | port3 |
| Source | All |
| Destination | VIP Web Server |
| Service | HTTP |
| NAT | Disabled |
| Log Allowed Traffic | All Sessions |
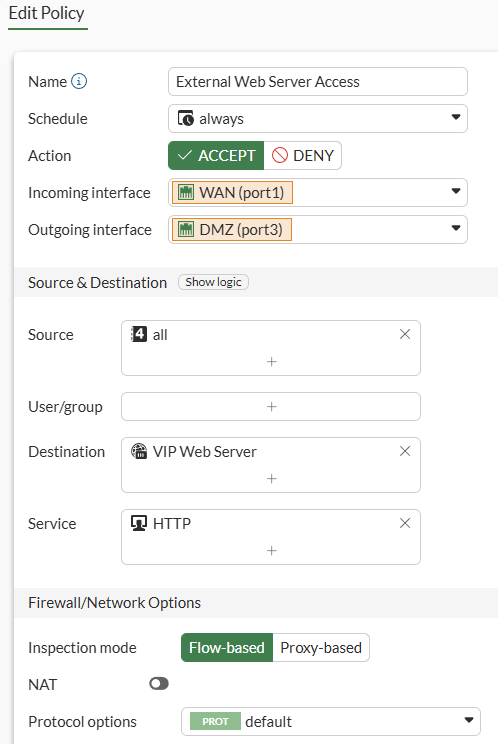
An important point is that the VIP object, rather than the server’s real IP address, must be selected as the destination. The service must be HTTP (TCP port 80), which corresponds to the listening port of the internal server. The VIP handles the external-to-internal port translation.
NAT should remain disabled in this policy because the VIP is already performing the required destination NAT.
3. Test Access from an External User#
From the external user, open:
http://203.0.113.5:8080The request should reach the web server successfully.
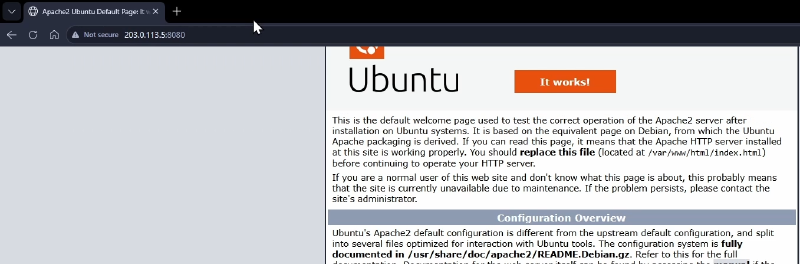
Verify the Traffic Log:
Go to: Log & Report > Forward Traffic.
Find the session generated by the external user.
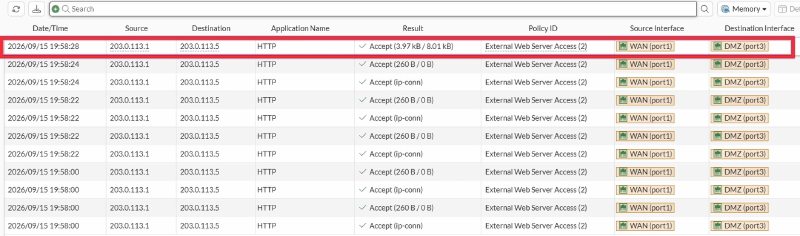
The session matches the External Web Server Access policy.
Opening the session details should show the destination NAT information:
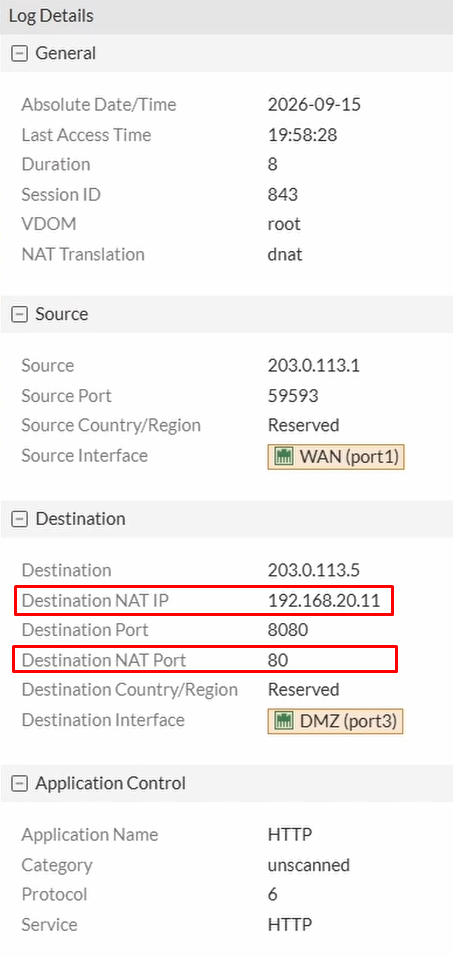
This confirms that FortiGate is translating the published service to the internal web server.
4. Test Access from a LAN User#
Now let’s test the same URL from PC1.
Instead of connecting directly to: http://192.168.20.11
PC1 will use the same address used by the external client: http://203.0.113.5:8080
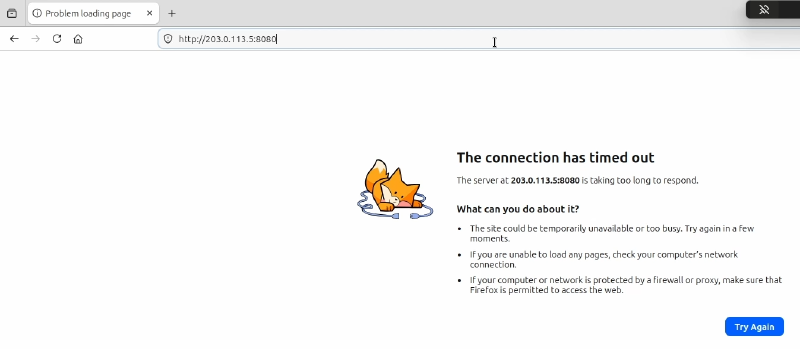
In this scenario, the connection fails. This is because the LAN client is attempting to access the web server through the FortiGate’s own WAN IP.
This scenario is commonly referred to as: Hairpin NAT or NAT Loopback. The FortiGate needs additional handling so the connection can travel through the required NAT path and return to the LAN client correctly.
5. Configure Hairpin NAT#
To support this scenario, create another firewall policy that allows the LAN client to reach the FortiGate WAN IP.
Go to: Policy & Objects > Firewall Policy. Select Create New.
Configure:
| Setting | Value |
|---|---|
| Name | LAN to Web Server WAN |
| Action | Accept |
| Incoming Interface | port2 |
| Outgoing Interface | port1 |
| Source | LAN subnet |
| Destination | FortiGate WAN IP |
| Service | TCP_8080 |
| NAT | Enabled |
| Log Allowed Traffic | All Sessions |
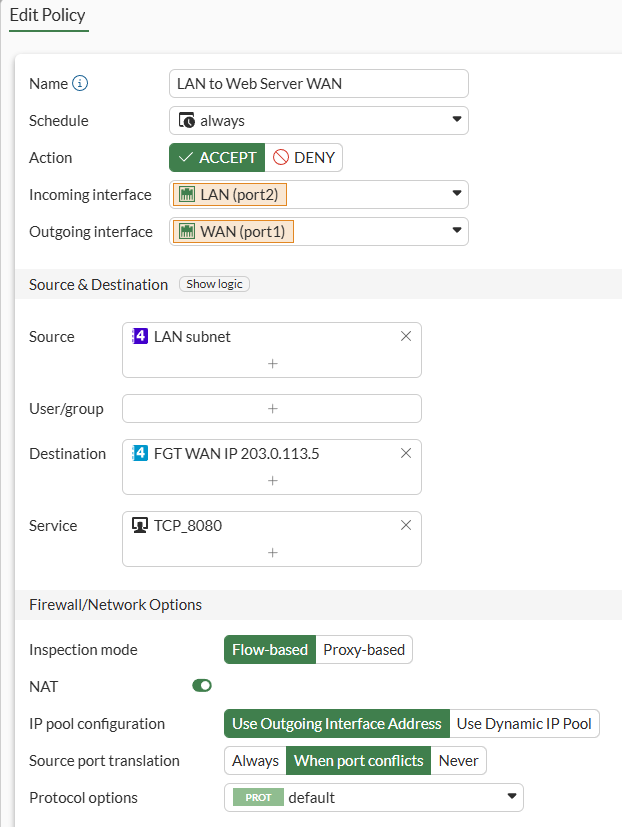
Create an address object representing the FortiGate WAN IP:
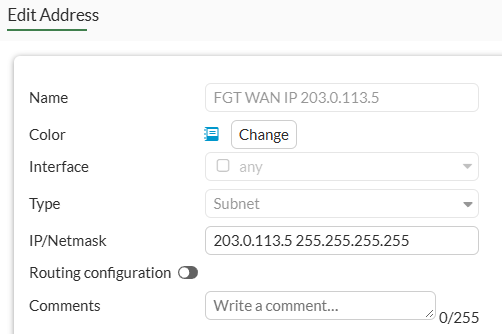
Then create a custom service for TCP port 8080:
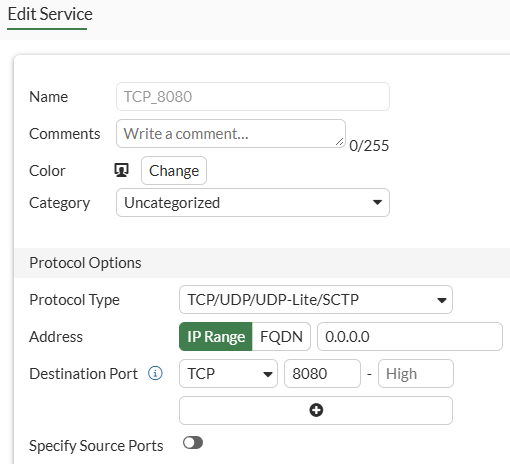
The purpose of NAT in this policy is to make sure the return traffic follows the expected path through the FortiGate. Without the required source NAT, the web server could receive the request from the LAN client and attempt to return the traffic directly to the LAN network. That can result in an asymmetric routing situation.
With NAT enabled, FortiGate can maintain the session through the expected path and correctly handle the return traffic for the hairpin connection.
6. Test Hairpin NAT#
Return to PC1 and open:
http://203.0.113.5:8080This time, the connection should succeed.
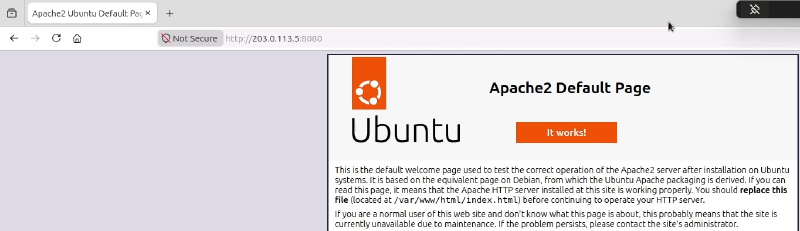
PC1 is now accessing the internal web server using exactly the same IP address and port that external users use.
7. Understanding the Hairpin NAT Traffic Logs#
There is an interesting detail when troubleshooting this configuration.
After testing from PC1, you might look at the firewall policy statistics and expect the LAN to Web Server WAN policy to show the matching traffic.
However, depending on the FortiGate processing and session handling, this policy can show zero bytes even though it was part of making the hairpin connection possible.
The traffic logs provide more useful information.
Go to: Log & Report > Forward Traffic.
Find the session generated by PC1.
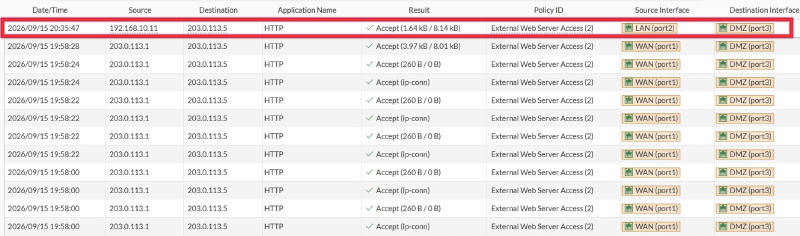
See that the session matches External Web Server Access rather than LAN to Web Server WAN.
The important distinction is that the source interface remains LAN, even though the session is associated with the VIP-based destination NAT policy, which has WAN as its source interface.
This is why the configuration should be understood as two related pieces:
- The VIP and the
External Web Server Accesspolicy provide the destination NAT and authorization for the published service. - The
LAN to Web Server WANpolicy provides the NAT path required for the LAN client to access the published service through the FortiGate WAN IP.
Together, these configurations allow both external and internal clients to use the same published address.