
Setting up a FortiGate firewall from scratch can seem daunting, but following a structured initial configuration ensures both seamless end-to-end network connectivity and baseline administrative security.
Whether you are deploying a virtual appliance (VMware) or a physical FortiGate unit, this step-by-step guide walks you through initial access, network routing, firewall policies, NAT, and essential hardening settings.
Initial Access and First Login#
Depending if you’re using a hardware or virtual appliance, the initial access to the FortiGate differs:
- Hardware appliances:
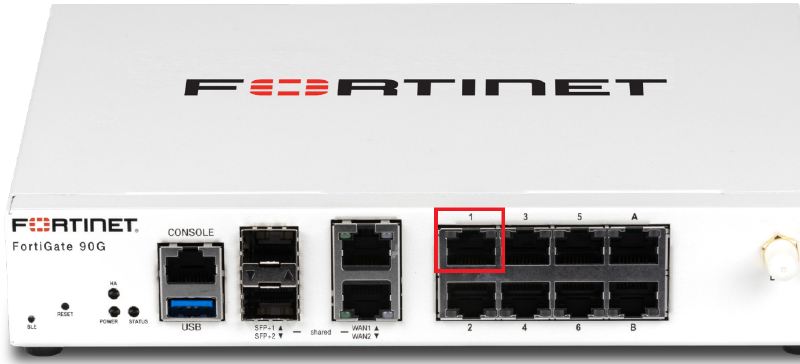
- Entry-Level Models (e.g., FortiGate 50G, 60F, 70G, 80F, 90G): connect your PC to FortiGate
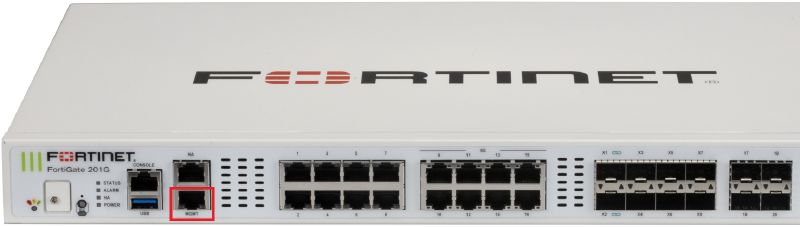
port1. - Enterprise Models (3-digit series or higher): connect your computer directly to the dedicated management (
MGMT) port.
- Entry-Level Models (e.g., FortiGate 50G, 60F, 70G, 80F, 90G): connect your PC to FortiGate
FortiGate 90G - port1:
FortiGate 200G - MGMT port:
The default management IP address for physical appliances is 192.168.1.99/24. Set your computer’s IP within this subnet.
- Virtual Machines appliances:
port1defaults to DHCP client mode.
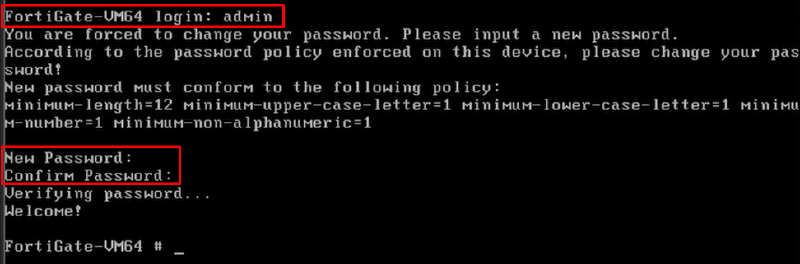
For FortiGate VM appliances, connect to its VM console and at the first login as admin you must set a new password:
Next, to find its assigned IP execute the following command once you are log into the VM console:
# show system interface ?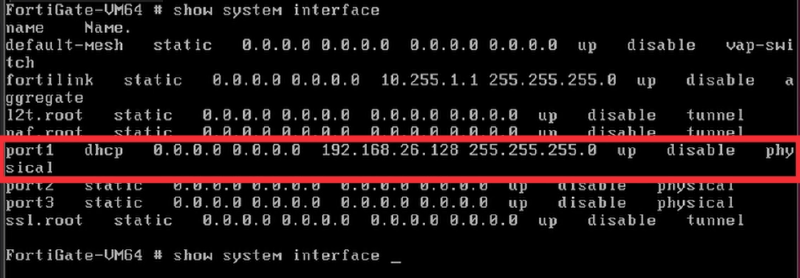
Accessing the Web GUI#
- Now that you know the FortiGate IP address, open a web browser and navigate to:
https://<FortiGate-IP>In FortiGate hardware appliances the default URL would be https://192.168.1.99
- Accept the browser security warning regarding the self-signed certificate
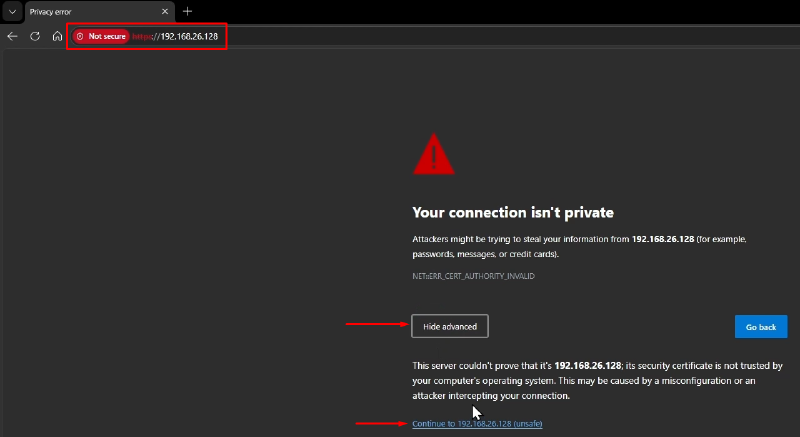
- Log in with admin and your newly created password, or define a new password if this is the first time you’re log in to FortiGate:
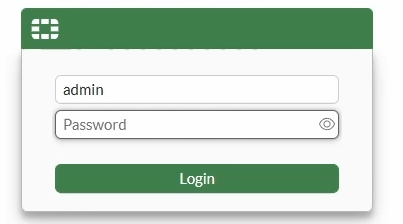
- Skip the initial setup wizard if you are configuring a fresh appliance from scratch.
Topology#
We will use the following topology to exemplify the LAN and WAN configuration of the following sections:

- FortiGate
port1interface is connected to the WAN router subnet, providing internet connectivity. - FortiGate
port2interface is connected to the LAN subnet, where a client VM is also connected.
The goal will be to allow the client VM internet traffic to be routed and permitted through FortiGate.
Configuring the WAN Interface and Default Route#
Follow these steps to configure the WAN interface:
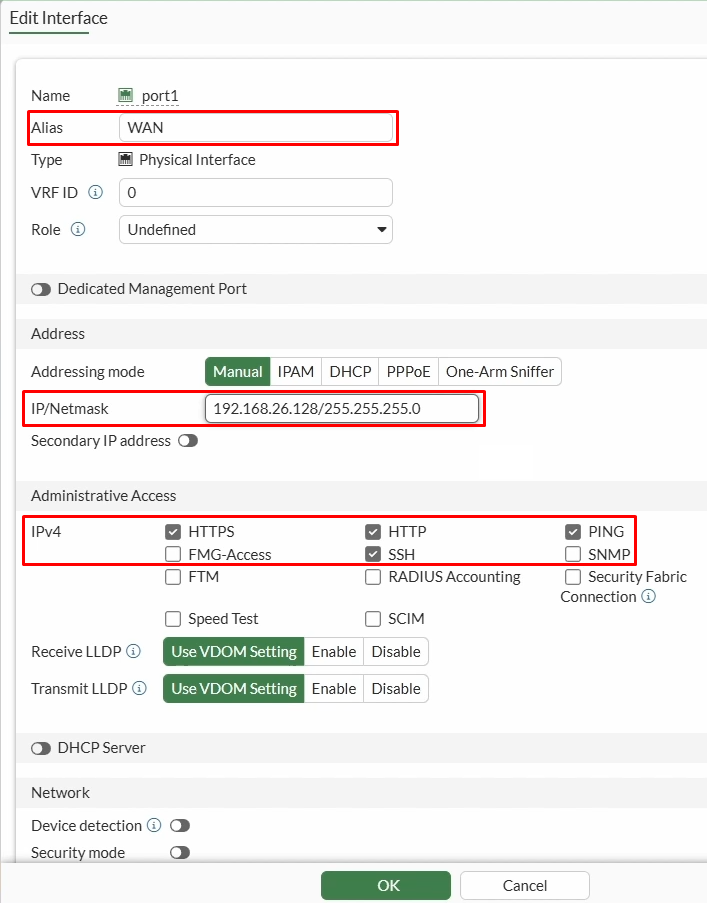
- Navigate to
Network > Interfacesand editport1. - Set an alias (e.g., WAN) for easy identification.
- Change addressing mode to
Manualand define the static IP address and subnet mask according to the topology. - Leave at least
HTTPS, andSSHadministrative access enabled for now. - Press
OKto save changes.
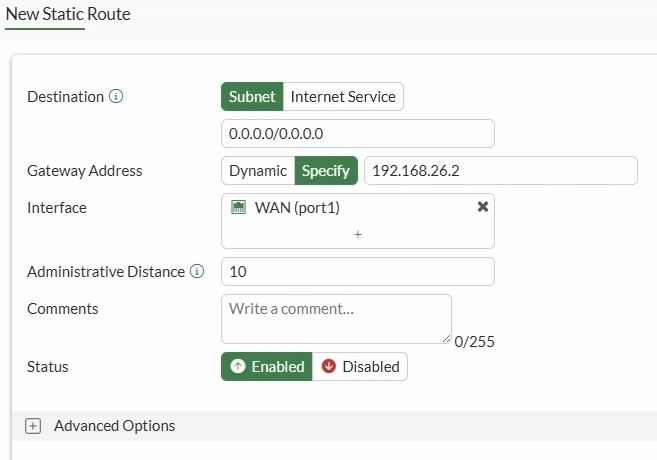
Follow these steps to configure the default static route:
- Go to
Network > Static Routes, click onCreate New. - Configure the default route:
- Destination:
0.0.0.0/0.0.0.0 - Gateway Address:
192.168.26.2 - Interface:
WAN (port1)
- Destination:
- Press
OKto save changes.

On the top right corner, you can open a new CLI Console session to test internet connectivity from the firewall:
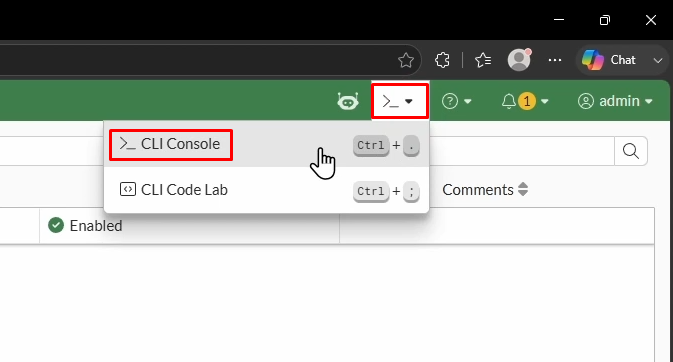
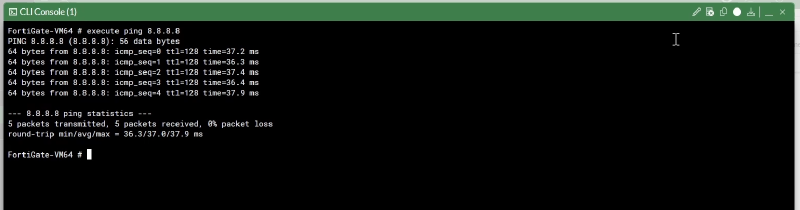
Use the following command for testing internet connectivity from FortiGate:
# execute ping 8.8.8.8If everything went well we should see ping responses:
Setting Up the LAN Interface & DHCP Server#
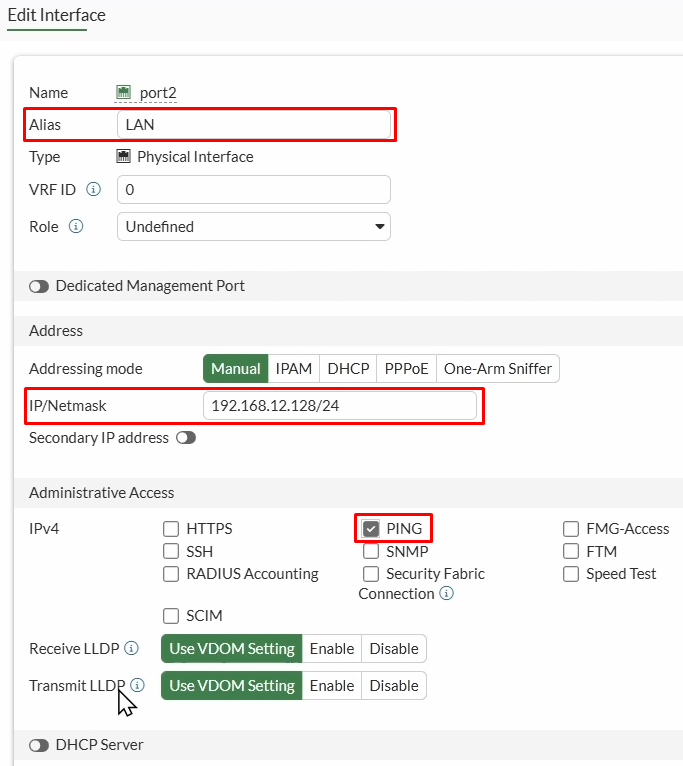
Follow these steps to configure the LAN interface:
- Navigate to
Network > Interfacesand editport2. - Set an alias (e.g., LAN) for easy identification.
- Define the static IP address and subnet mask according to the topology.
- Enable PING administrative access in case we want to test connectivity later.
- Also enable
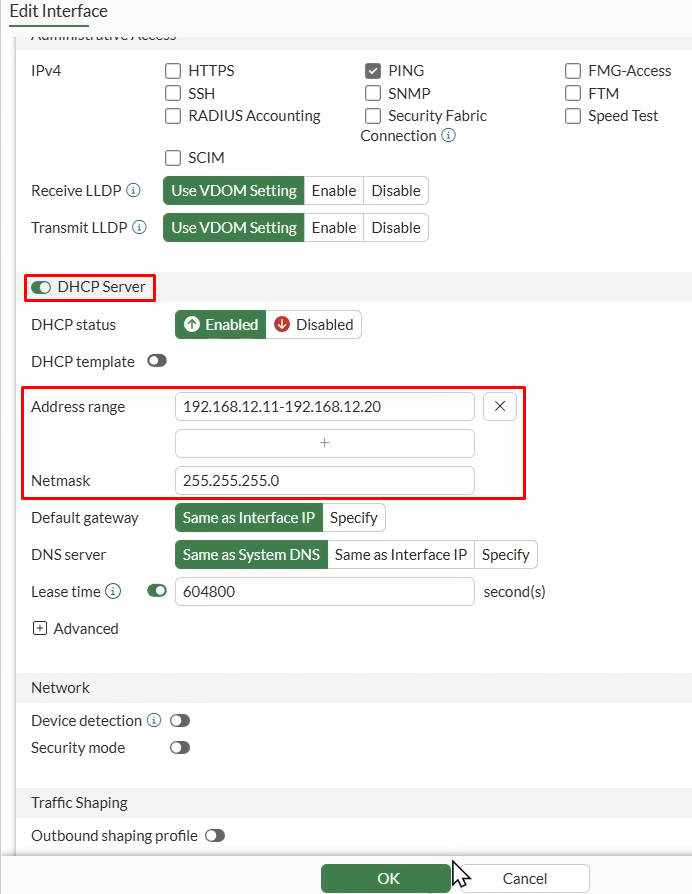
DHCP Serverto lease IP addresses and default route to clients on the LAN networks. Set theAddress rangeandNetmaskmatching to the LAN network in the topology:
- Press
OKto save changes.
Creating a Firewall Policy#
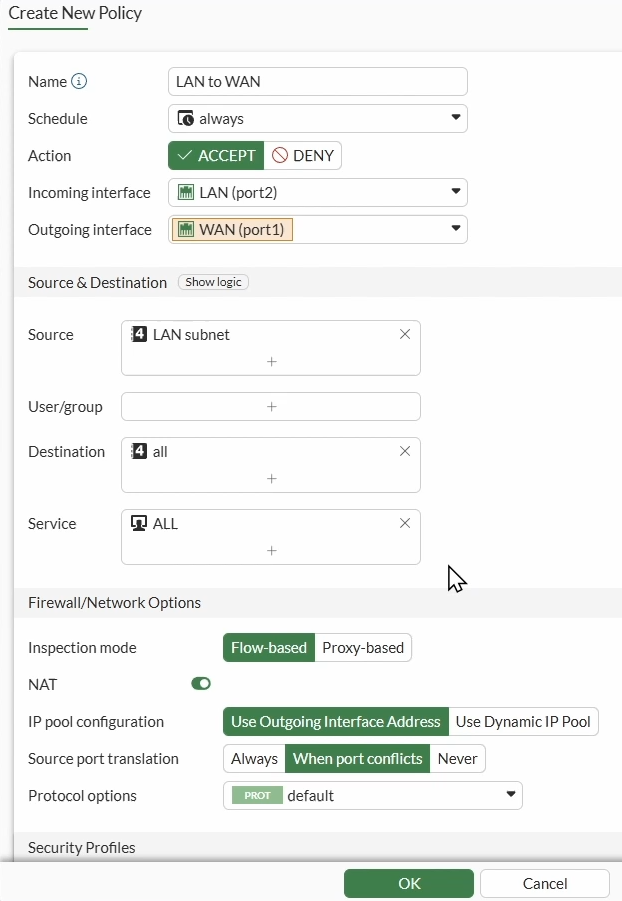
FortiGate blocks all traffic by default. You must create an explicit firewall policy to allow internal LAN users to browse the web:
- Navigate to
Policy & Objects > Firewall Policyand clickCreate New. - Set the firewall policy matching fields:
- Name:
LAN to WAN - Incoming Interface:
LAN(port2) - Outgoing Interface:
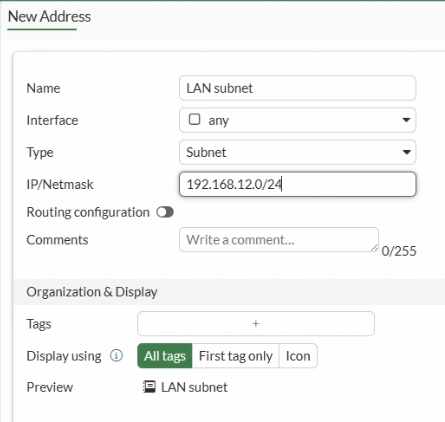
WAN(port1) - Source: Create a subnet address object matching your local network (e.g.,
192.168.12.0/24) - Destination:
all - Service:
ALL - Action:
ACCEPT - NAT: Enable Source NAT (SNAT) so internal private addresses translate to the public WAN IP
- Log Allowed Traffic: Set to All Sessions
- Name:
The LAN subnet address object is defined as follows:
Finally, press OK to see your new policy listed:

Clients connected to LAN network should now be able to reach internet through FortiGate after successfully receiving a DHCP lease from FortiGate.
Recommended System Settings#
Besides network connectivity settings, some initial system and administration settings are also recommended.
- Go to
System > Settings- Define a meaningful
Hostnamefor this FortiGate device - Under
Generaltab, set theTime zoneaccording to your region.
- Define a meaningful
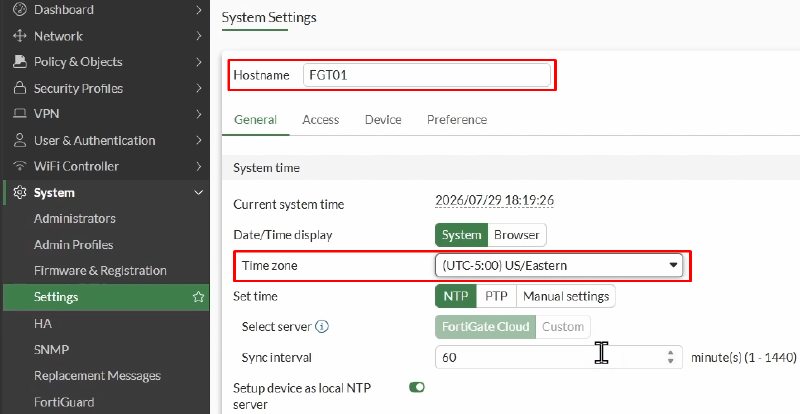
- Under
Accesstab, enableRedirect to HTTPS, so unsecure HTTP administrative connections are redirected to HTTPS encrypted sessions. Also you can increase theIdle timeoutfor admin sessions.
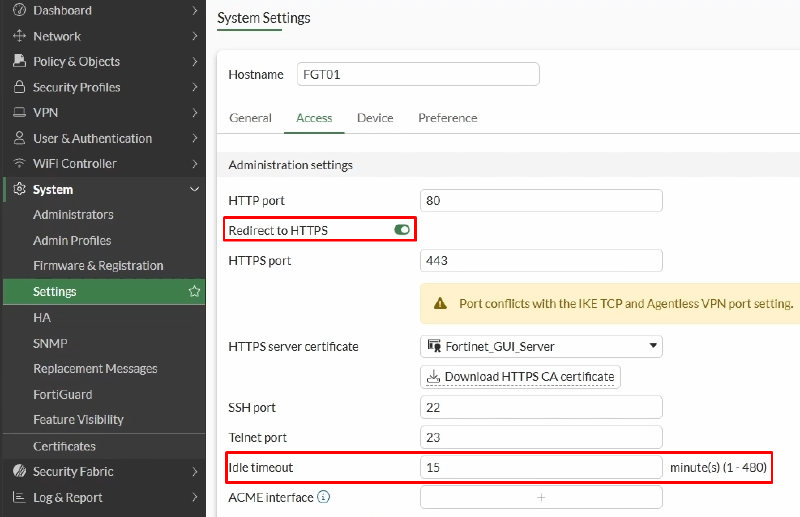
Click
Applyto save changes.Under
System > Administrators, you can create a new FortiGate administrator so the defaultadmincan be deleted according to best practices.
Define the username, password and super_admin profile.
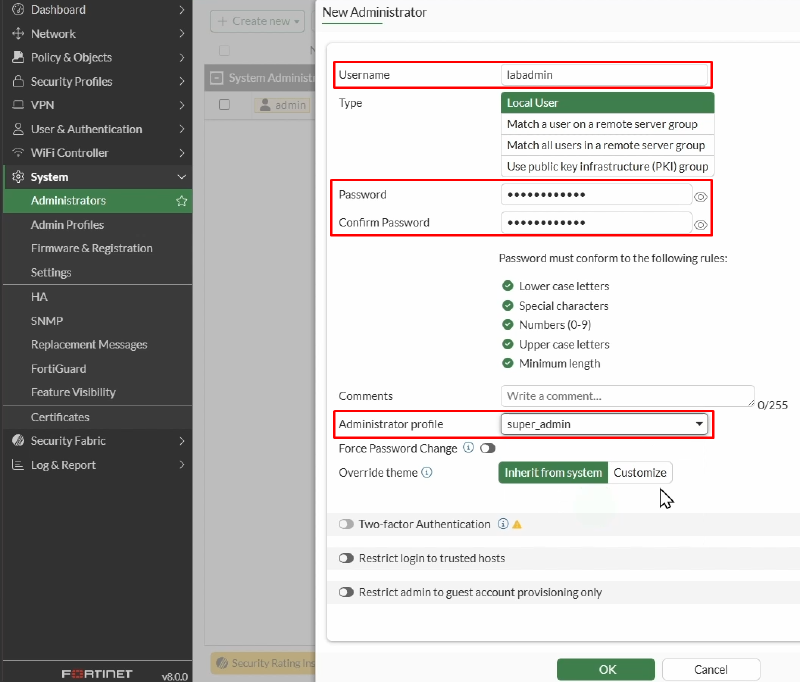
- Click
OKto save changes.

- Log out, sign back in using the new account, and delete the default
adminaccount to eliminate brute-force targeting.
