
Setting up a virtual firewall in a network simulation environment allows us to test policies and configurations risk-free. Below is a step-by-step technical guide on how to download, import, activate, and access a FortiGate Virtual Machine (VM) inside GNS3.
Tested using FortiGate/FortiOS v7.6.7
Prerequisites#
Before starting the installation process, ensure you have the following components installed and running:
- GNS3 Architecture: GNS3 installed on your host system alongside a functional GNS3 VM (recommended for running QEMU-based virtual machines on Windows/macOS)
- Fortinet Account: An active account on the Fortinet Support portal (https://support.fortinet.com) to download KVM system images
Step 1: Download the FortiGate KVM Image#
- Navigate to support.fortinet.com and log in to your account.
- Go to
Downloads > VM Images. - Select KVM as the platform.
- Pick your desired FortiOS release version. I’ll be using v7.6.7. Select the New deployment of FortiGate for KVM option (zip archive).
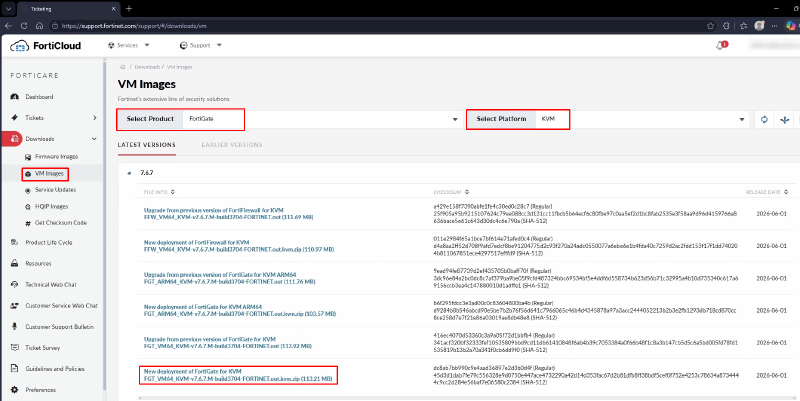
Step 2: Prepare the Image File#
- Extract the downloaded file, named
fortios.qcow2. - Rename
fortios.qcow2to match the extracted folder name while keeping the.qcow2extension intact
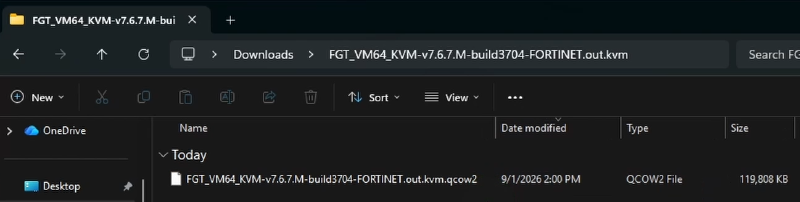
Step 3: Create Appliance Template in GNS3#
- Open GNS3 and go to
Security Devicesand select+New Template:
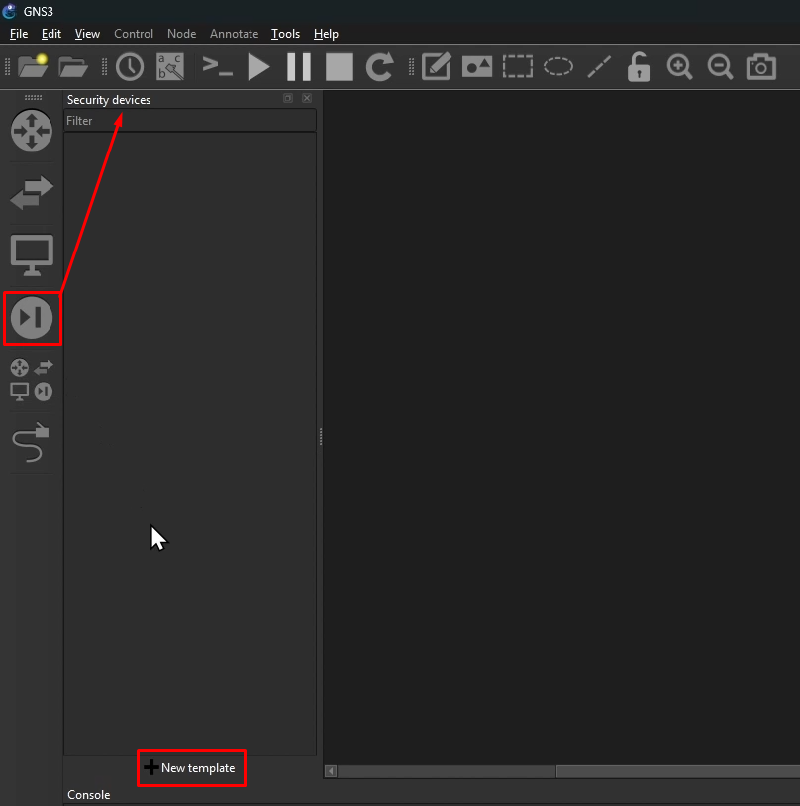
- New template: Install an appliance from the GNS3 server (recommended),
Next. - Select
FortiGateunder theFirewallscategory and clickInstall. - Server type: Install the appliance on the GNS3 VM (recommended),
Next. - Qemu binary: leave the default option,
Next. - Click
Create a new versionand enter the exact version tag (e.g.,7.6.7),OK. - Image: paste the exact filename of your renamed
.qcow2file,OK. - Disk image filename for hdb_disk_image:
empty30G.qcow2(default value),OK. - Find your new FortiGate template on the list, click on missing file, and select the
Importbutton.
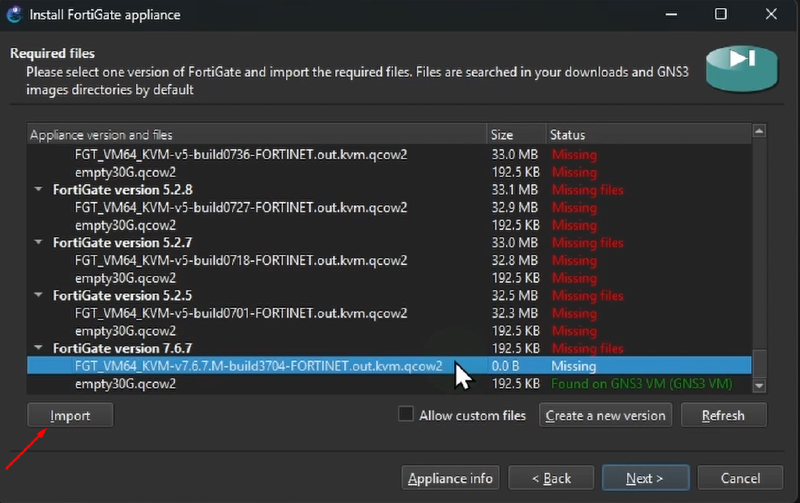
- Browse to your renamed
.qcow2file, and upload it. The FortiGate version status should change toReady to installand the.qcow2file to found. ClickNext.
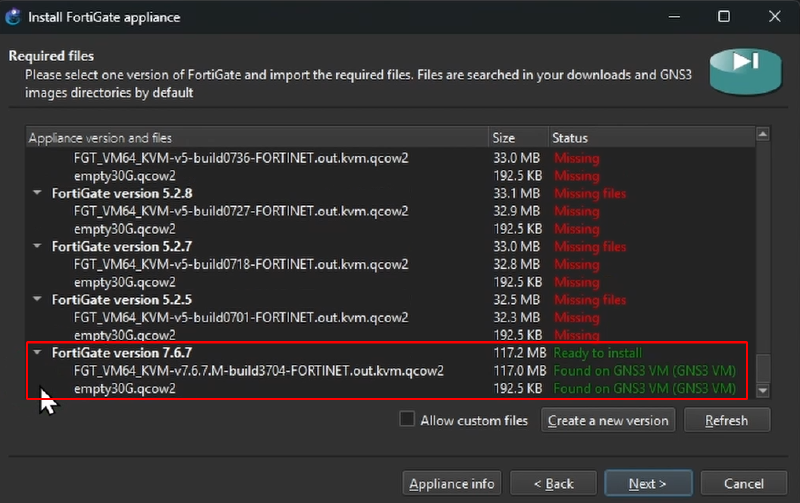
- Would you like to install FortiGate version 7.6.7?:
Yes Finish.
The FortiGate image is now ready to be used in a GNS3 project.
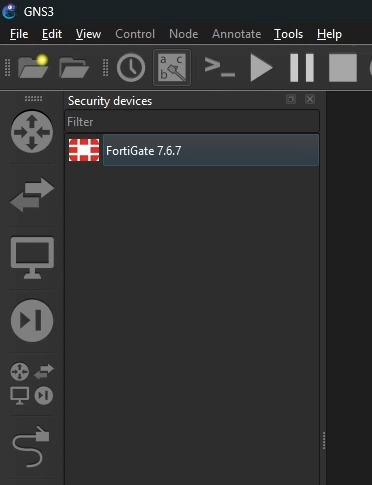
Step 4: Build the Topology#
- Create a new GNS3 project.
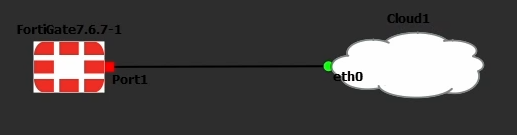
- Drag a FortiGate node and a Cloud node onto the canvas
- Connect
Port1on the FortiGate VM to the Cloud node (associated with the NAT network),eth0.
- Right-click the FortiGate node and select
Start, then right-click it again and open theConsoleCLI. Wait for the system to start.
Step 5: Activate Evaluation License#
- Once the FortiGate is up, log into the CLI using default credentials:
- Username:
admin - Password: (Leave blank - press Enter)
- Username:
- Set a new strong password when prompted.
- Bind the trial license to your FortiCare account:
execute vm-license-options account-id <account-email>
execute vm-license-options account-password <account-password>
execute vm-license
Fortinet permits one active trial instance per account. Decommission existing trial instances on the Fortinet Support site if needed prior to activation.
- Confirm the reboot request to apply the evaluation license
Step 6: Access the Web GUI#
- After rebooting, log back into the CLI and identify the assigned DHCP IP address on Port 1:
show system interface ?- Open your web browser and enter
https://<port1_IP>. - Log in with your new
admincredentials. - Complete the initial setup wizard:
- Migrate Config: Select Later.
- Automatic Patch Upgrades: Disable (recommended for lab environments).
- Dashboard Setup: Select Optimal.
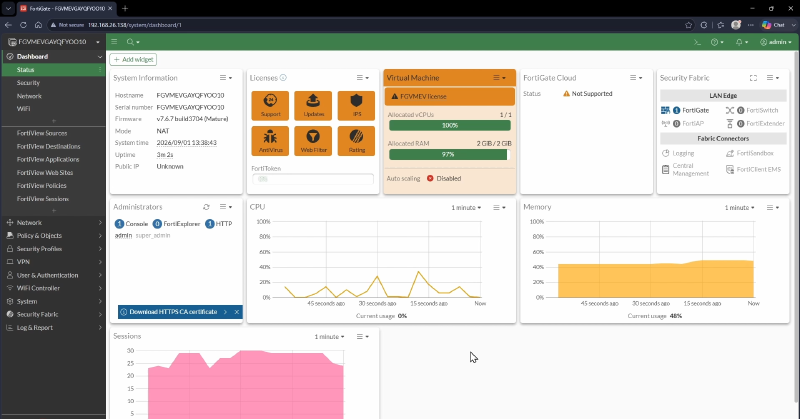
You now have a working FortiGate virtual machine with a trial license activated on GNS3.