
Deploying a FortiGate Next-Generation Firewall (NGFW) virtual machine within EVE-NG is one of the best ways to practice enterprise network security, test firewall policies, and build complex lab topologies.
This comprehensive step-by-step guide walks you through downloading, preparing, licensing, and configuring FortiOS inside EVE-NG.
Prerequisites#
Before starting, ensure your environment meets the following baseline requirements:
- EVE-NG Environment: A fully functional EVE-NG server (bare-metal or running on platforms like VMware Workstation, ESXi, or Proxmox).
- Hardware Virtualization Support: CPU with Intel VT-x or AMD-V enabled in both your motherboard BIOS and your virtual machine hypervisor settings.
- Fortinet Account: An active account on the Fortinet Support Portal to download the KVM deployment image.
Step 1: Download the FortiGate KVM Image#
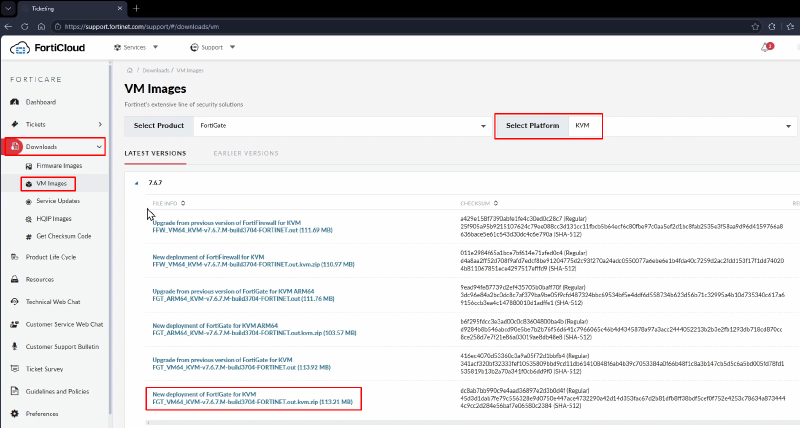
- Navigate to support.fortinet.com and log in.
- Go to
Downloads > VM Images. - Set the platform to
KVM. - Select the desired version, which will be v7.6.7 in my case, and download the New deployment of FortiGate for KVM option (zip archive).
Step 2: Upload and Prepare the Image in EVE-NG#
To run custom QEMU images in EVE-NG, the directory and file naming conventions must strictly follow EVE-NG requirements.
- Connect to EVE-NG via SSH
Open PowerShell, Terminal, or your preferred SSH client and log into your EVE-NG command-line interface as root:
# ssh root@<EVE-NG_IP_Address>- Create the image directory
EVE-NG requires FortiGate directories to start with fortinet-. Including the version number in the directory name helps organize multiple images. For example, in my case (FortiGate v7.6.7):
mkdir /opt/unetlab/addons/qemu/fortinet-FGT-v7.6.7- Transfer the downloaded image to EVE-NG
Using SCP (or an SFTP tool like WinSCP), upload the downloaded zip file directly into your newly created directory:
scp .\FGT_VM64_KVM-v7.6.7.M-build3704-FORTINET.out.kvm.zip root@<EVE-NG_IP_Address>:/opt/unetlab/addons/qemu/fortinet-FGT-v7.6.7/- Extract and rename the Disk Image
Go back to EVE-NG CLI and extract the archive contents. EVE-NG expects the virtual hard disk file to be named virtioa.qcow2:
cd /opt/unetlab/addons/qemu/fortinet-FGT-v7.6.7
unzip FGT_VM64_KVM-v7.6.7.M-build3704-FORTINET.out.kvm.zip
mv fortios.qcow2 virtioa.qcow2
You can optionally remove the archive file since it’s no longer needed:
rm FGT_VM64_KVM-v7.6.7.M-build3704-FORTINET.out.kvm.zip- Fix EVE-NG Permissions
Run the standard EVE-NG permission fix script to ensure the hypervisor can launch the image properly:
/opt/unetlab/wrappers/unl_wrapper -a fixpermissionsStep 3: Add the FortiGate Node to Your Lab Canvas#
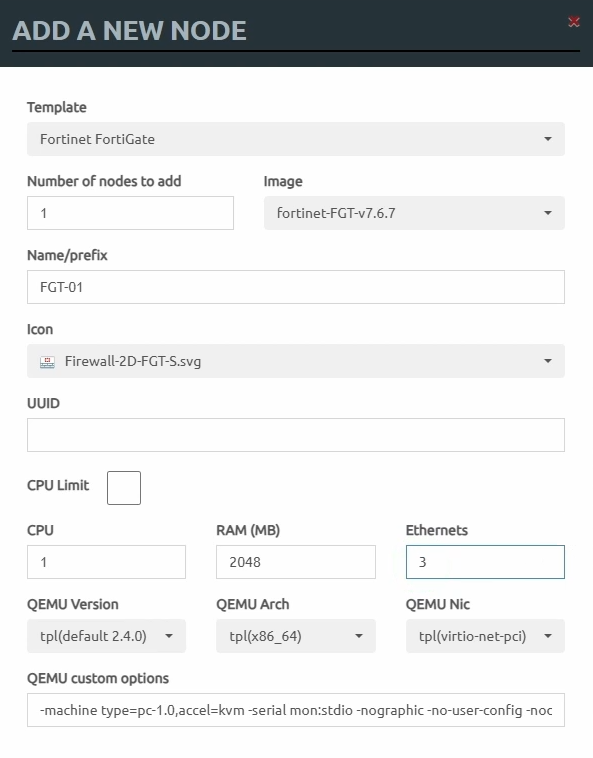
- Open your EVE-NG Web UI and create a new lab or open an existing topology.
- Right-click on the canvas, select
Add a new object > Node. - Choose the
Fortinet FortiGatetemplate. - Set the node properties:
- Image:
fortinet-FGT-v7.6.7 - CPU: 1 vCPU
- RAM: 2048 MB (2 GB)
- Ethernet Interfaces: 3
- Image:
- Save the node configuration.
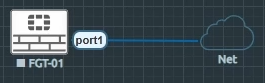
To allow your FortiGate instance to activate its trial license and provide Web GUI access, connect port1 to an outbound internet-capable network.
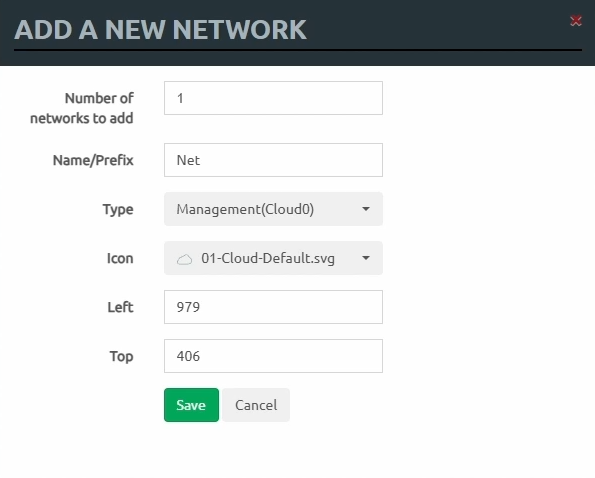
- Right-click the canvas and select
Add Object > Network - Select your network with internet connectivity as the network type and
Save:
- Drag a cable from the FortiGate node
port1to the management network node.
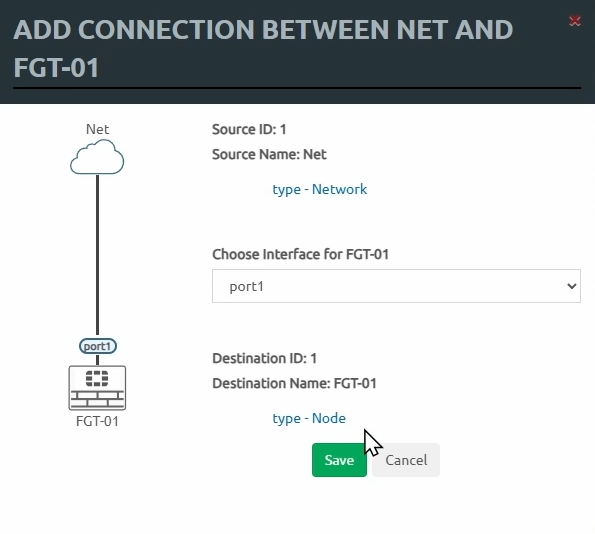
The firewall should be connected as follows:
Step 4: Register the Free Trial License via CLI#
- Right-click the FortiGate node and select
Start. - Left-click the node to launch the telnet console client.
- Log in with the default credentials:
- Username:
admin - Password: (Leave blank - press Enter)
- Username:
- Set a strong initial administrator password when prompted.
- Register your trial license using your Fortinet Support credentials:
execute vm-license-options account-id <account-email>
execute vm-license-options account-password <account-password>
execute vm-licenseConfirm the system reboot when prompted to finalize trial license application.
Step 5: Access the FortiGate Web GUI#
- After the reboot completes, log back into the CLI and verify the IP address assigned to
port1via DHCP:
show system interface ?- Open your desktop web browser and navigate to
https://<Port1_IP_Address>. - Log in using the
adminaccount and your updated password. - Complete the initial setup wizard:
- Migrate Config: Select Later.
- Automatic Patch Upgrades: Disable (recommended for lab environments).
- Dashboard Setup: Select Optimal.
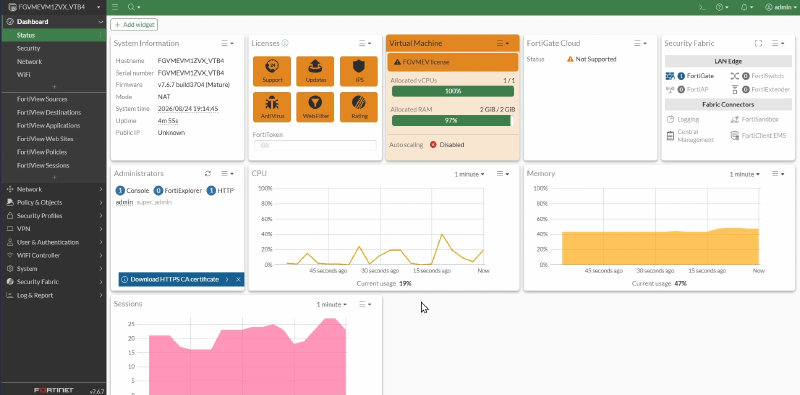
You now have a fully operational FortiGate 7.6.7 Virtual Machine running inside EVE-NG. From here, you can start building more complex network topologies.