Introduction#
IPsec VPN offers different network topology possibilities, which differ from each other in how remote peers and clients connect to the VPN and how VPN traffic is routed.
An special IPsec VPN network topology is known as “FortiClient dialup”, a type of remote access VPN. In this scenario, FortiGate acts as a dialup server and remote clients with dynamic IP addresses and behind NAT devices connect as dialup clients using FortiClient (managed by EMS).
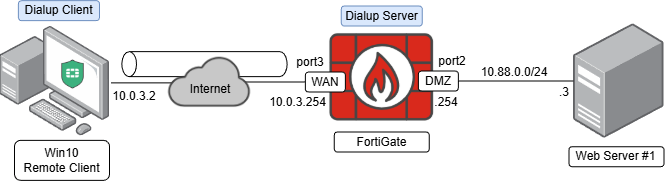
The following topology presents a Windows remote client (IP 10.0.3.2) with FortiClient installed acting as the dialup client, and connected through an IPsec VPN to a FortiGate acting as the dialup server on its WAN interface (IP 10.0.3.254). The remote client needs access to a web server connected to the DMZ network of the FortiGate:
IPsec VPN configuration using VPN Wizard#
On FortiGate GUI, follow these steps to configure an IPsec VPN using FortiClient as a dialup client:
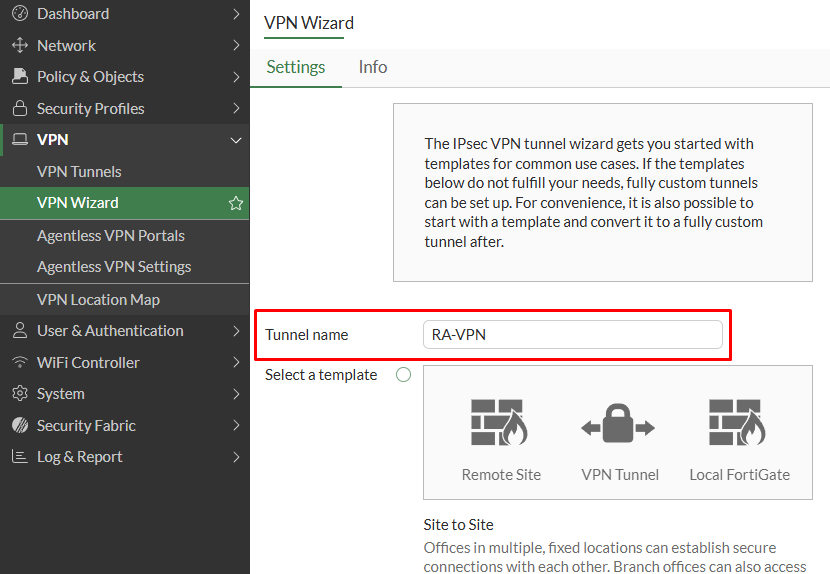
- To speed up the configuration process you can use one of the pre-existing IPsec VPN templates. Go to
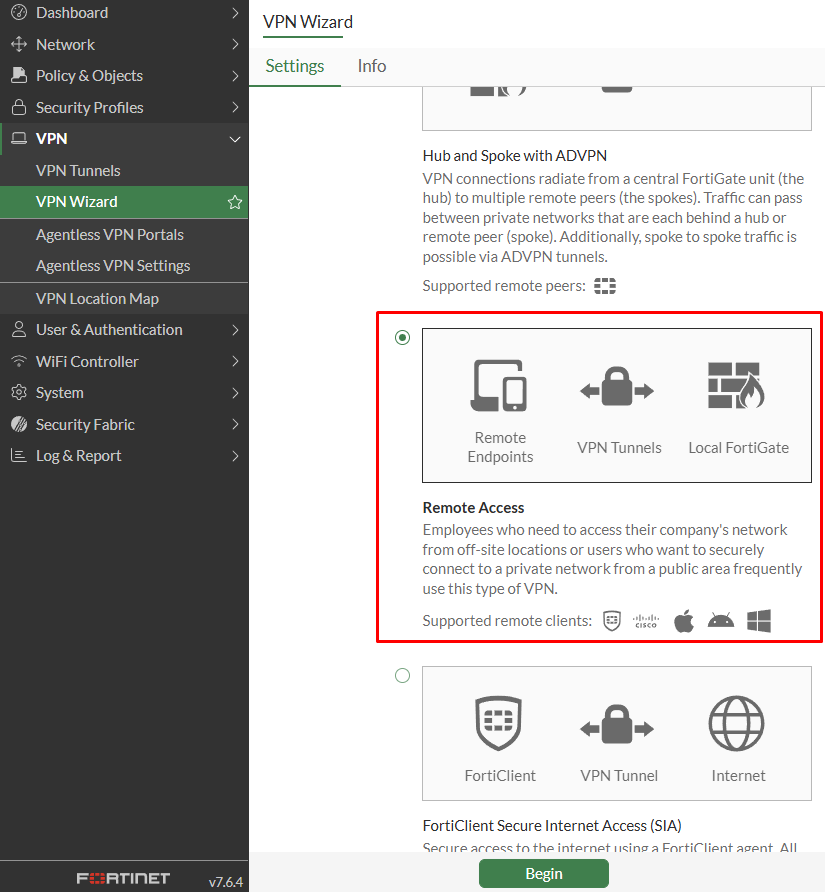
VPN > VPN Wizard, set aTunnel name, and select theRemote Access Template:
- Click on
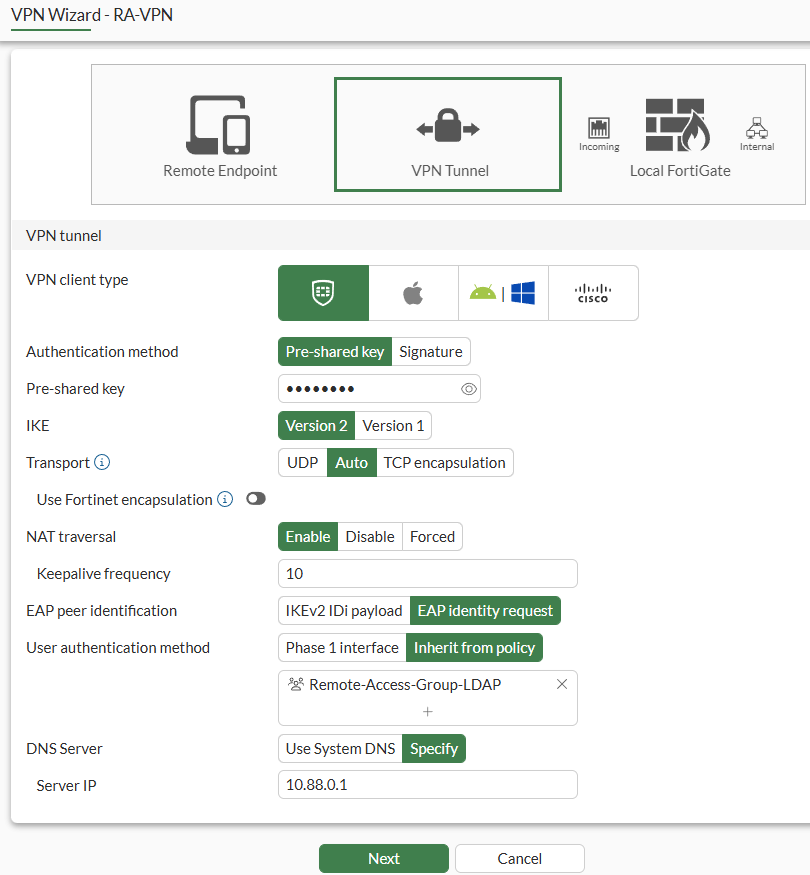
Beginand configure the VPN tunnel settings:
| Parameter | Value |
|---|---|
| VPN client type | FortiClient |
| Authentication method | Pre-shared key |
| Pre-shared key | (set the desired password) |
| IKE | Version 2 |
| Transport | Auto - Using IKEv2, the IKE Transport option can be set to Auto. This setting makes IKE to use UDP encapsulation at the beginning and FortiClient can failover to TCP within a defined threshold wait time if the UDP connection fails. |
| Use Fortinet encapsulation | Disabled (not supported by FortiClient v7.4.4) |
| NAT traversal | Enable |
| Keepalive frequency | 10 |
| EAP peer identification | EAP identity request |
| User authentication method | Inherit from policy. Select the desired user group. The selected user groups will be added as User/group matching condition on the IPsec firewall policies by the VPN wizard. |
| DNS Server | Specify |
| Server IP | 10.88.0.1 |
- Click on
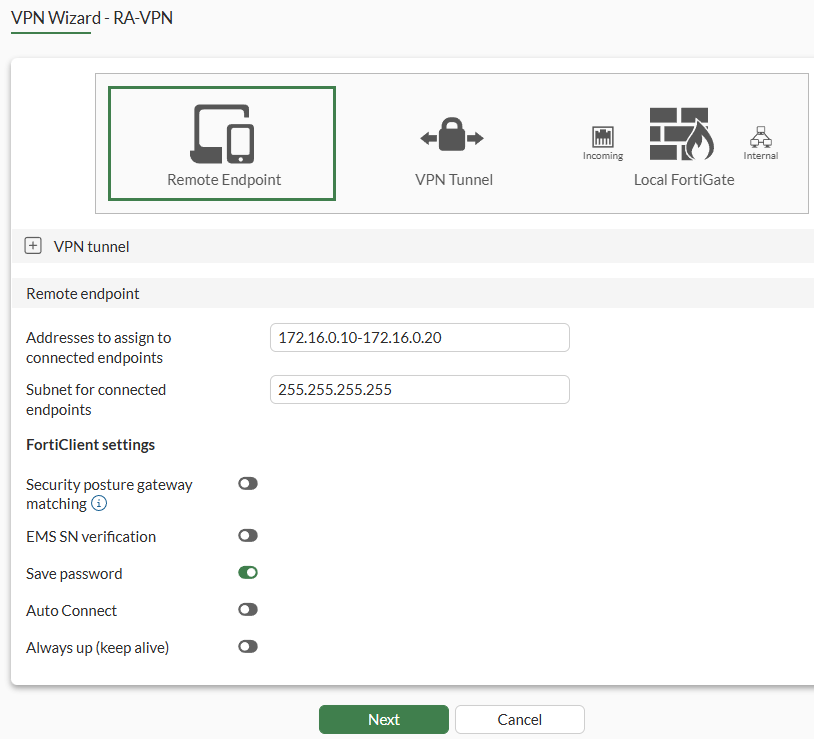
Nextto set the remote endpoint settings:
| Parameter | Value |
|---|---|
| Addresses to assign to connected endpoints | 172.16.0.10-172.16.0.20 |
| Subnet for connected endpoints | 255.255.255.255 |
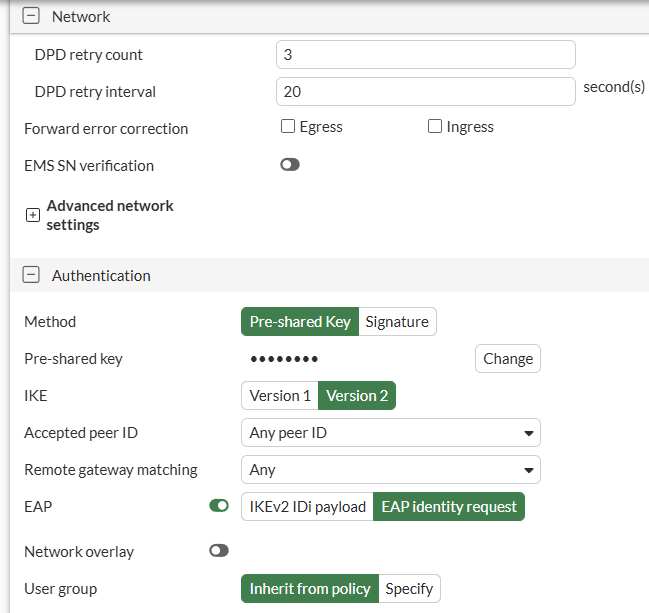
| Security posture gateway matching | Disabled. (Security Posture tags received from EMS can be used to restrict if the VPN tunnel can be established). See: FortiOS 7.6.4 Administration Guide- Enforcing security posture tag match before dial-up IPsec VPN connection |
| EMS SN verification | Disabled. (Restricts VPN tunnel establishment from only licensed FortiClient endpoints. Both FortiGate and FortiClient must be connected to the same EMS). See: FortiOS 7.6.4 Administration Guide - Enhancing IPsec security using EMS SN verification |
| Save password | Enabled |
| Auto Connect | Disabled |
| Always up (keep alive) | Disabled |
- Click on
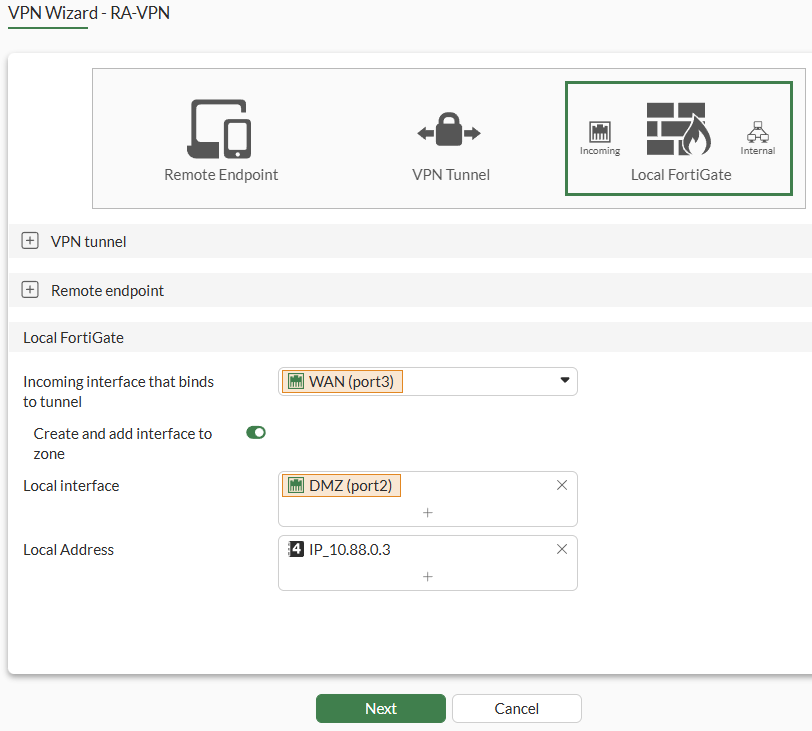
Nextagain, and set the local FortiGate configuration regarding the firewall policy:
- Select
Nextand review all the settings, which include all the objects that will be created by the VPN wizard:
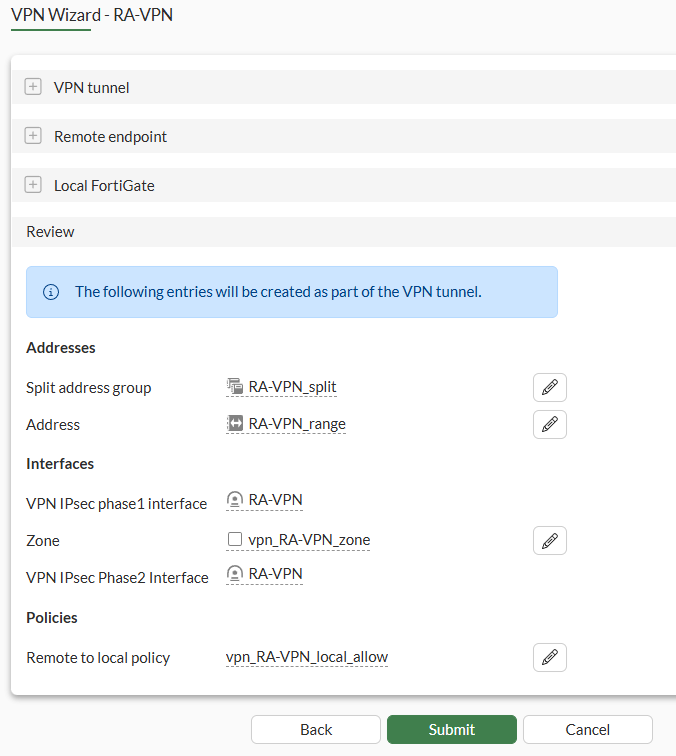
Finally click on
Submitto proceed with the VPN wizard configuration.Additionally, you can customize the IKE UDP port and IKE TCP port (can’t conflict with HTTPS management port) via CLI in the following part of the configuration:
# show full system settings | grep "ike-port\|ike-tcp-port"
    set ike-port 500
    set ike-tcp-port 4500
Reviewing the VPN Wizard Configuration#
The following objects were created by the VPN Wizard:
IPsec VPN - Phase 1#

On CLI, the equivalent configuration is as follows:
config vpn ipsec phase1-interface
edit "RA-VPN"
set type dynamic
set interface "port3"
set ike-version 2
set peertype any
set net-device disable
set mode-cfg enable
set ipv4-dns-server1 10.88.0.1
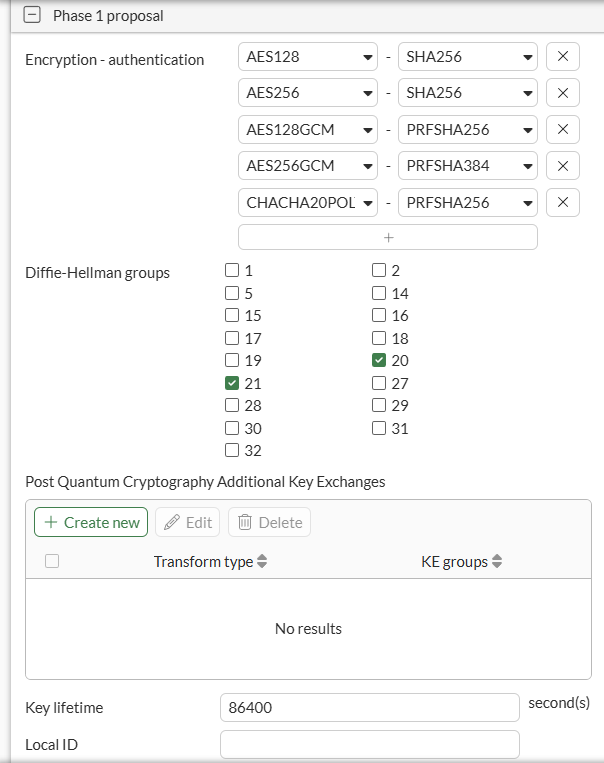
set proposal aes128-sha256 aes256-sha256 aes128gcm-prfsha256 aes256gcm-prfsha384 chacha20poly1305-prfsha256
set comments "VPN: RA-VPN -- Created by VPN wizard"
set dhgrp 20 21
set eap enable
set eap-identity send-request
set wizard-type dialup-forticlient
set transport auto
set ipv4-start-ip 172.16.0.10
set ipv4-end-ip 172.16.0.20
set ipv4-split-include "RA-VPN_split"
set save-password enable
set psksecret ENC 8Z86yLGD/0ULzyXWrwcTz4/YsZwIuaBDWtFb9ZZDeyf6nsg71tYkz+kFG3bqBL69ebUk1u1PKtZCN23pOp4tgd7m8mfyxqOcAL/DyCHgYWUUKDxG18p+JVtzgLsJV1BBIb6Hhk8DRpvt36BoK+S3A0RYZFV7BnLotg2YOG8/dZ6UuAUtMAH43FX1ok8HOFmEh5t4WFlmMjY3dkVA
next
end
IPsec VPN - Phase 2#
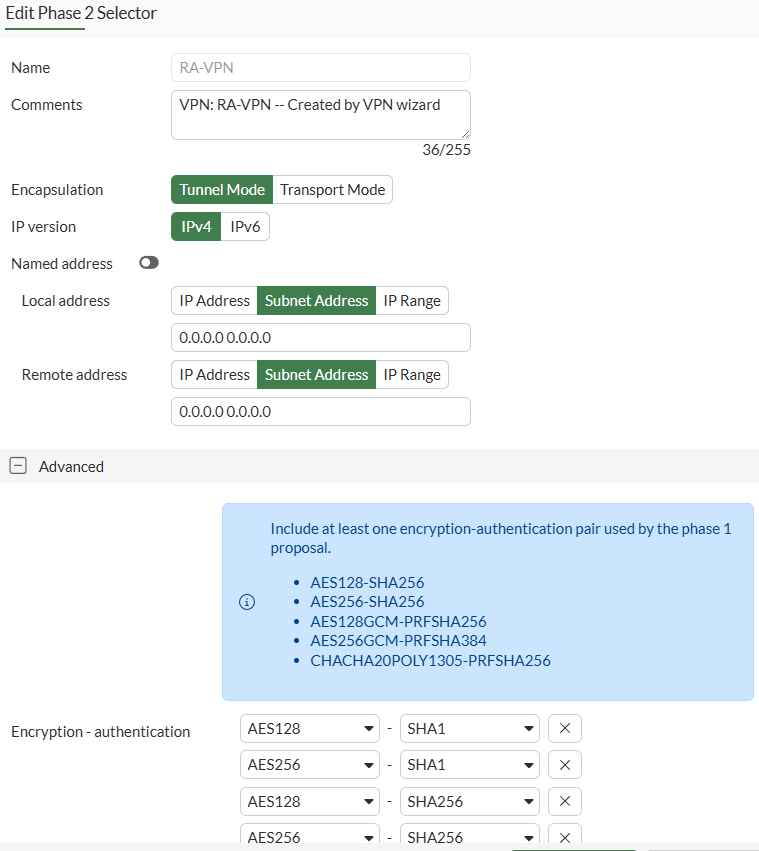

On CLI, the equivalent configuration is as follows:
config vpn ipsec phase2-interface
    edit "RA-VPN"
        set phase1name "RA-VPN"
        set proposal aes128-sha1 aes256-sha1 aes128-sha256 aes256-sha256 aes128gcm aes256gcm chacha20poly1305
        set dhgrp 20 21
        set comments "VPN: RA-VPN -- Created by VPN wizard"
    next
end
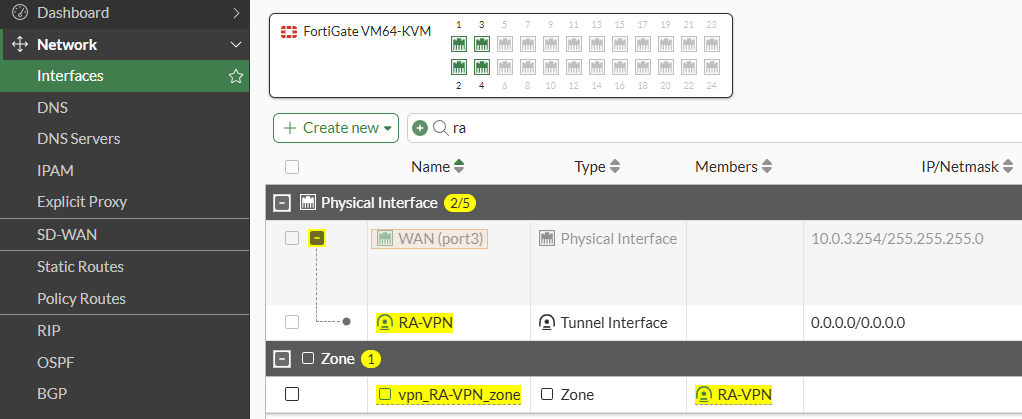
Network interface and zone#
An IPsec network interface created under the WAN interface is part of a new network Zone:
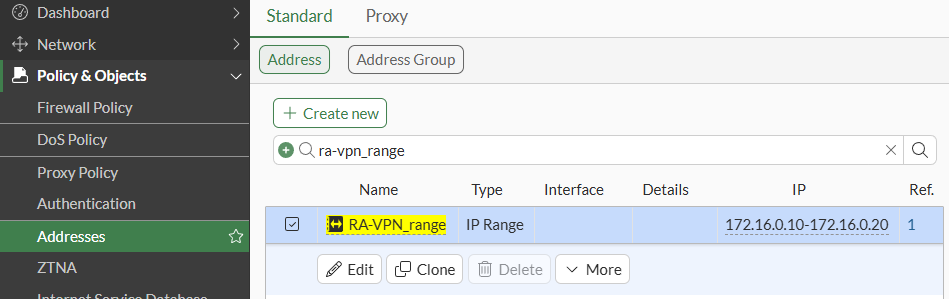
Address and Address Group#
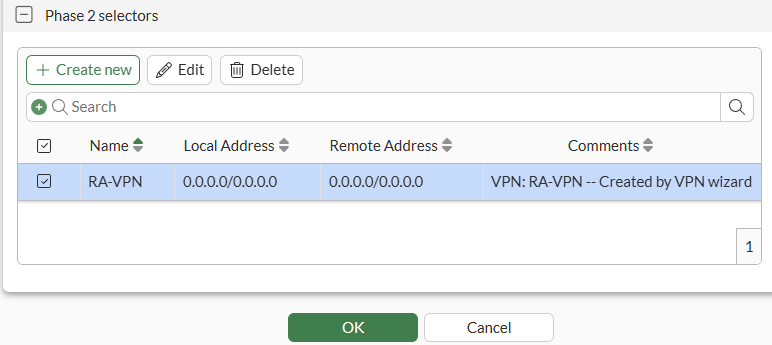
- A network address is created with the IP address range that will be assigned to connected clients:
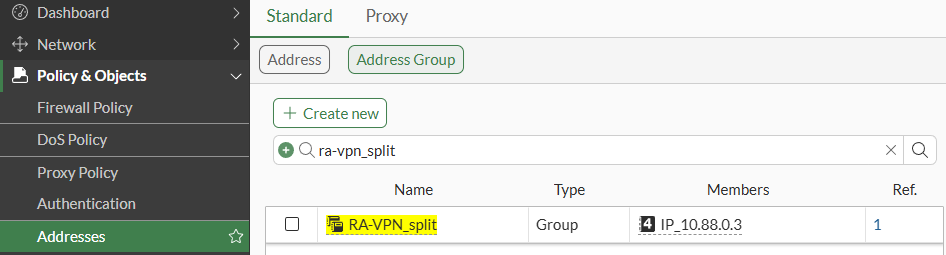
- An address group is created containing the defined destinations, which will be used as the
IPv4 split tunnelon IPsec Phase 1 settings:
Firewall Policy#
A firewall policy matching the IP range and user group as source and the defined destination:

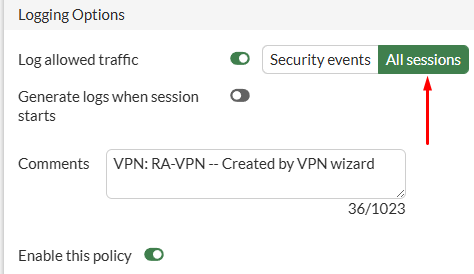
You can edit the firewall policy to log All sessions:
On CLI, the equivalent configuration is as follows:
config firewall policy
    edit 9
        set name "vpn_RA-VPN_local_allow"
        set uuid 87cf015a-d0ad-51f0-4db4-3f02db0e2878
        set srcintf "vpn_RA-VPN_zone"
        set dstintf "port2"
        set action accept
        set srcaddr "RA-VPN_range"
        set dstaddr "IP_10.88.0.3"
        set schedule "always"
        set service "ALL"
        set logtraffic all
        set nat enable
        set groups "Remote-Access-Group-LDAP"
        set comments "VPN: RA-VPN -- Created by VPN wizard"
    next
end
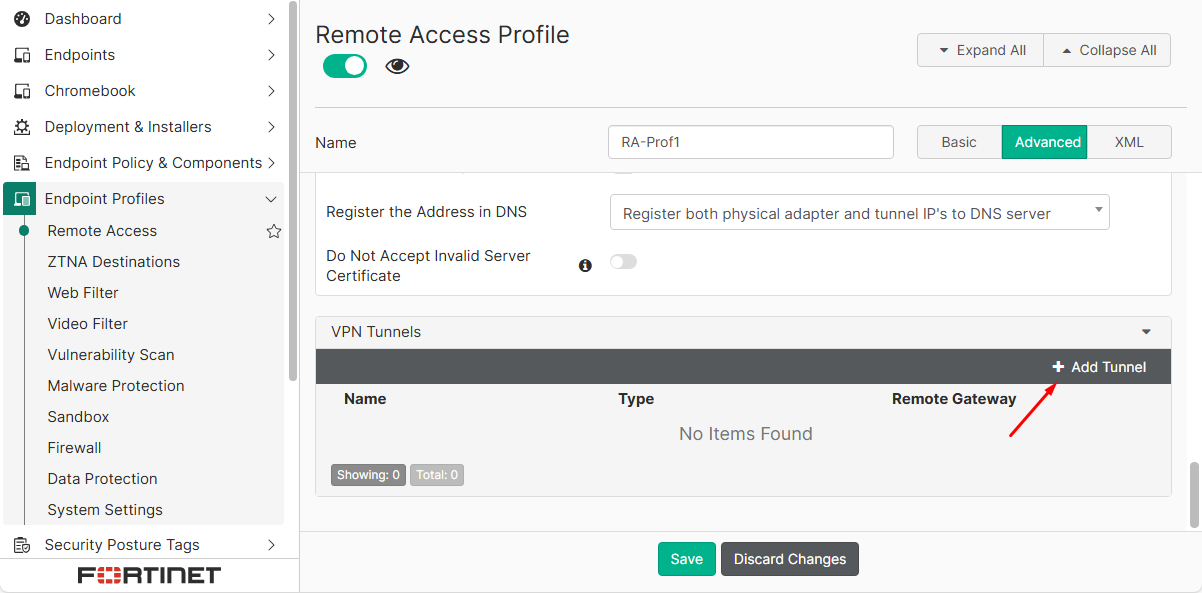
Configuring the Remote Access Endpoint Profile on EMS#
On EMS, configure the Remote Access endpoint profile where the IPsec dialup client will be defined. Make sure this profile is currently set or will be set to the users with FortiClient that need this VPN connection.
- On FortiClient EMS, go to
Endpoint Profiles > Remote Access. Add or edit the desired profile. - Under
VPN Tunnelssection, select theAdd Tunneloption:
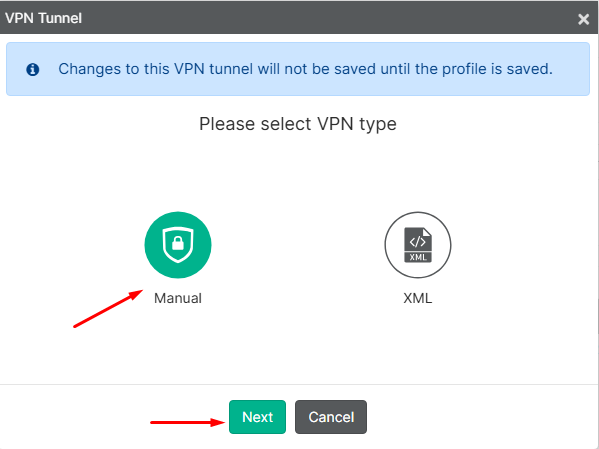
- Select
Manual, then click onNext:
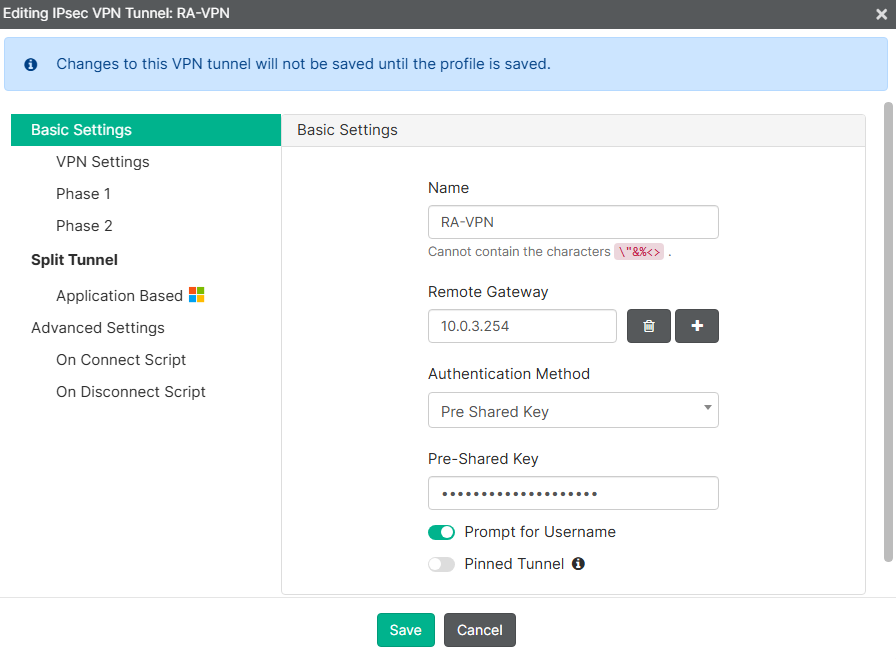
- For
Basic Settingssection complete the required parameters:
| Parameter | Value |
|---|---|
| Name | RA-VPN (this is the name that will be visible to the user on FortiClient) |
| Remote Gateway | 10.0.3.254 |
| Pre-Shared Key | (match the password set for the VPN IPsec on FortiGate) |
| Prompt for Username | Enabled |
| Pinned Tunnel | Disabled |
- On
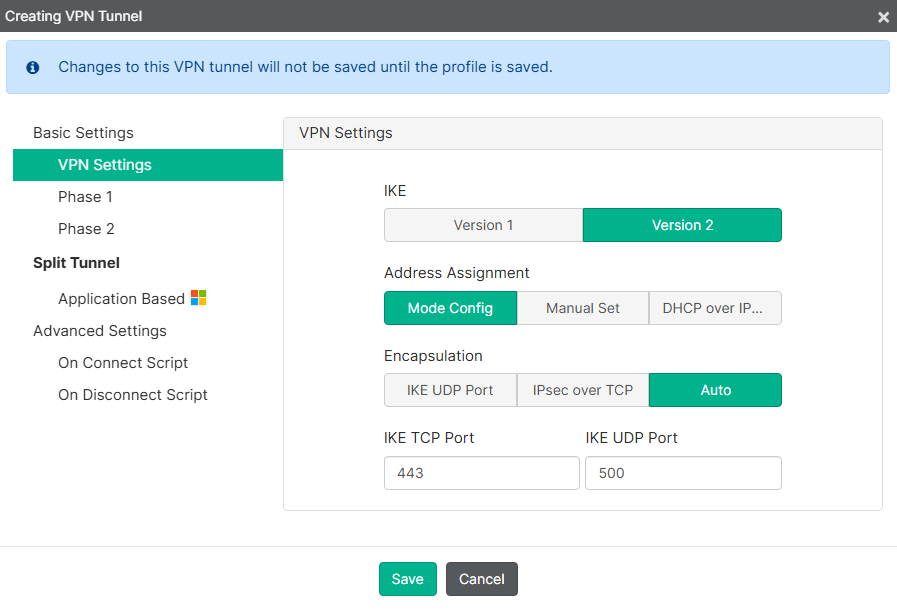
VPN Settingssection, define the following:
| Parameter | Value |
|---|---|
| IKE | Version 2 |
| Address Assignment | Mode Config |
| Encapsulation | Auto |
| IKE TCP Port | 443 |
| IKE UDP Port | 500 |
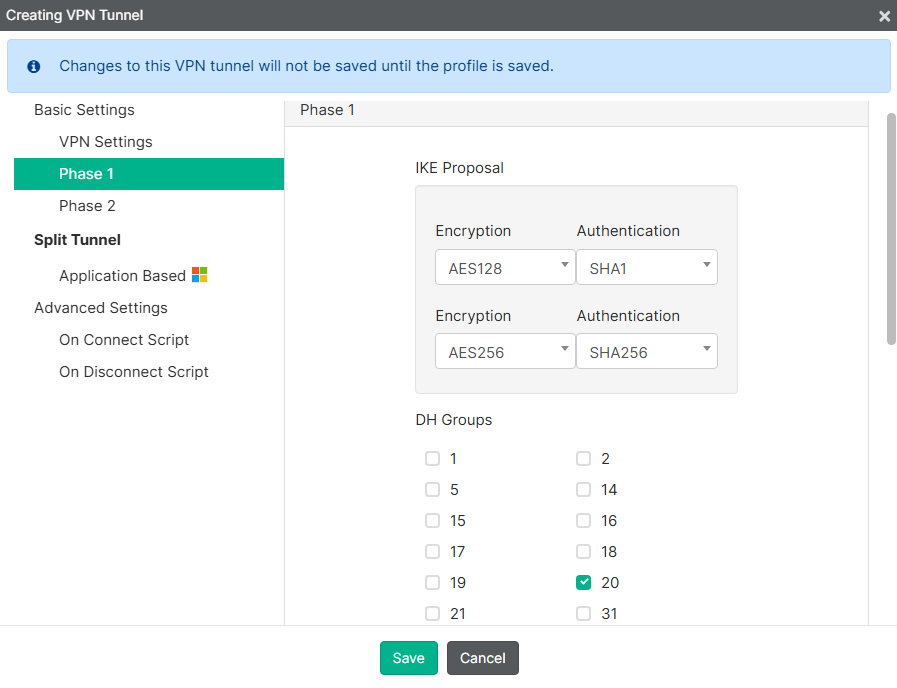
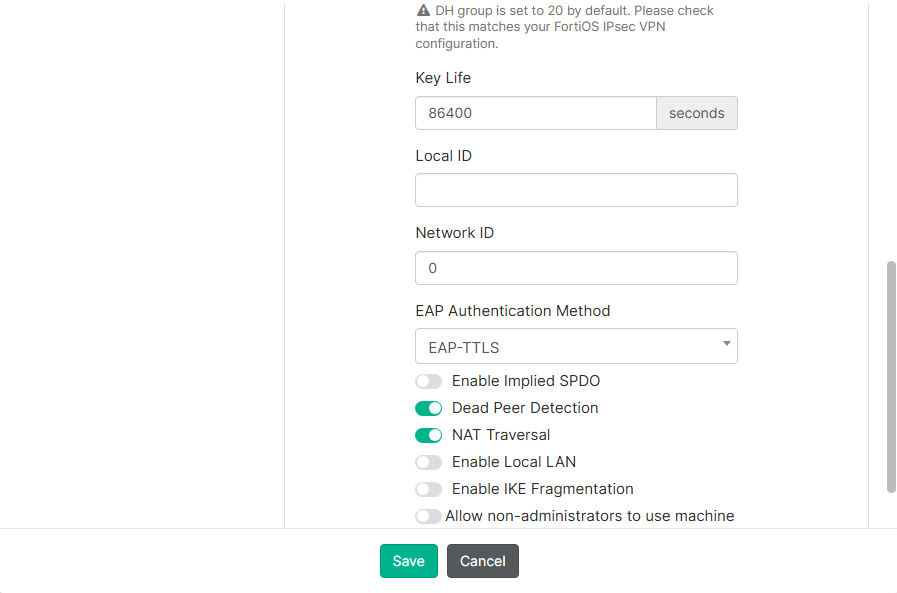
- For
Phase 1settings, change theEAP Authentication Method:
| Parameter | Value |
|---|---|
| IKE Proposal | Default values (AES128+SHA1, AES254+SHA256) |
| DH Groups | Default value (20) |
| Key Life | 86400 |
| EAP Authentication Method | EAP-TTLS |
| Dead Peer Detection | Enabled |
| NAT Traversal | Enabled |
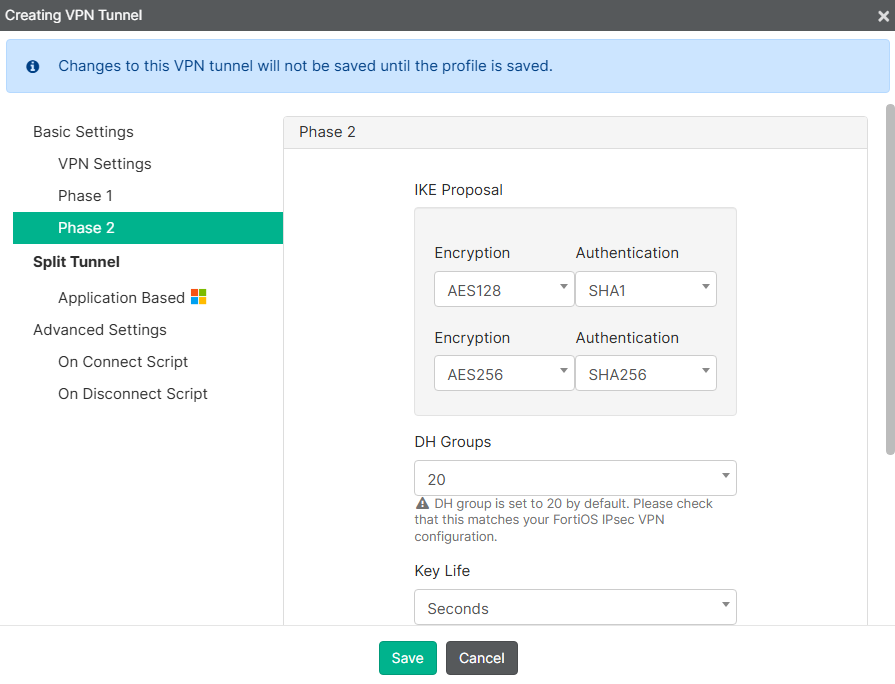
- Leave the default settings for
Phase 2:
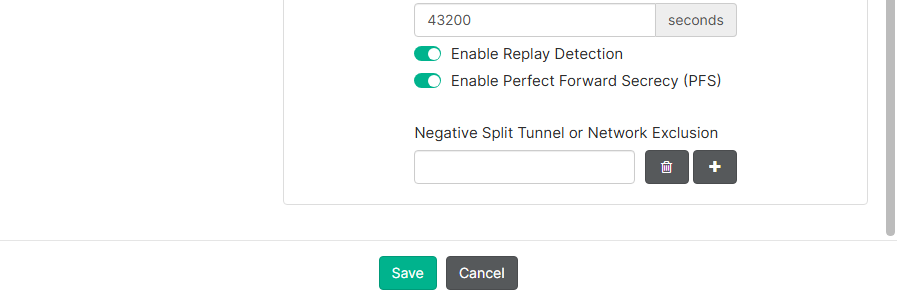
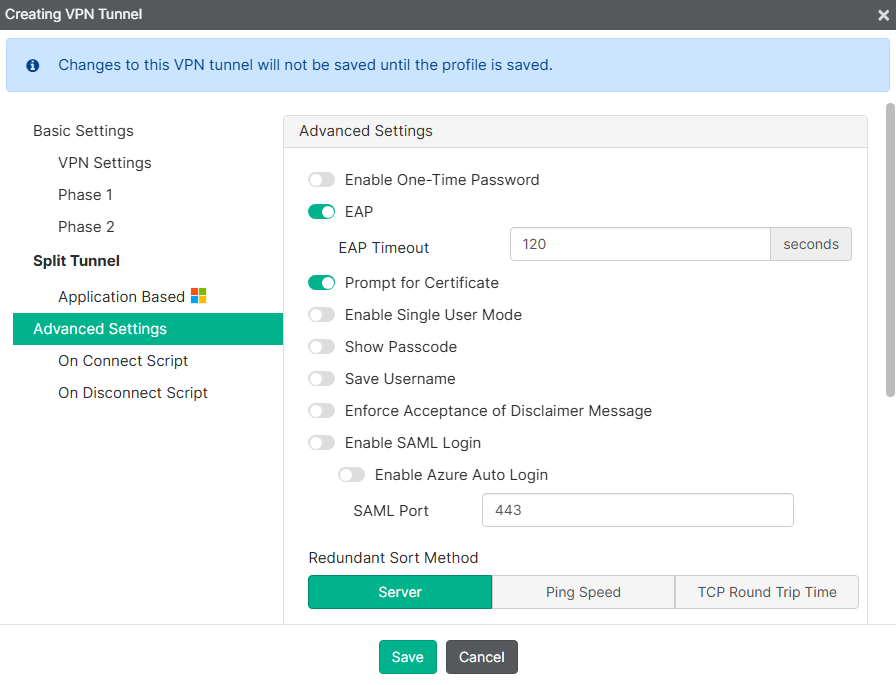
- Leave the default settings for
Advanced Settings:
- Select
Saveunder the VPN Tunnel menu and thenSaveagain under the profile configuration menu:
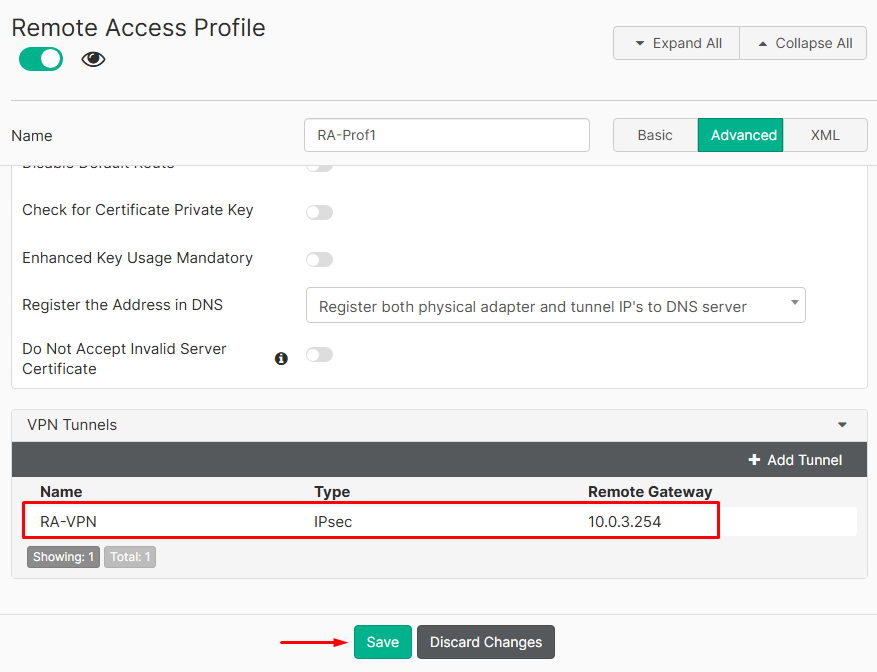
Make sure this Remote Access profile is configured on the Endpoint Policy for the endpoints that need this VPN connection.
Connecting to the VPN from FortiClient#
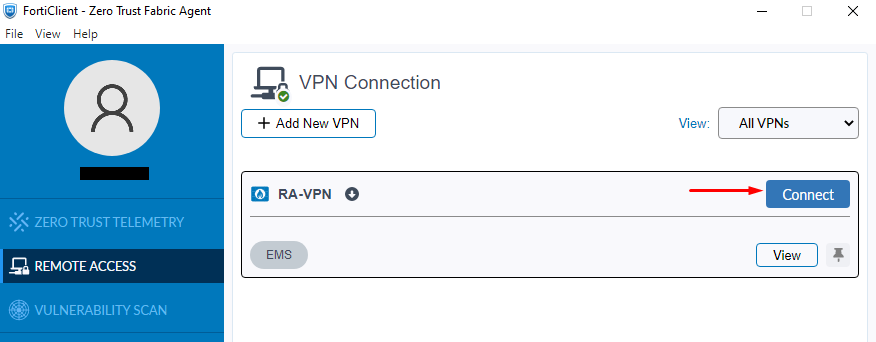
To verify that the VPN IPsec can be established, go to the endpoint where FortiClient is installed.
- On FortiClient, make sure the Remote Access profile is synchronized with the VPN defined in EMS.
- For the VPN entry select on
Connect:
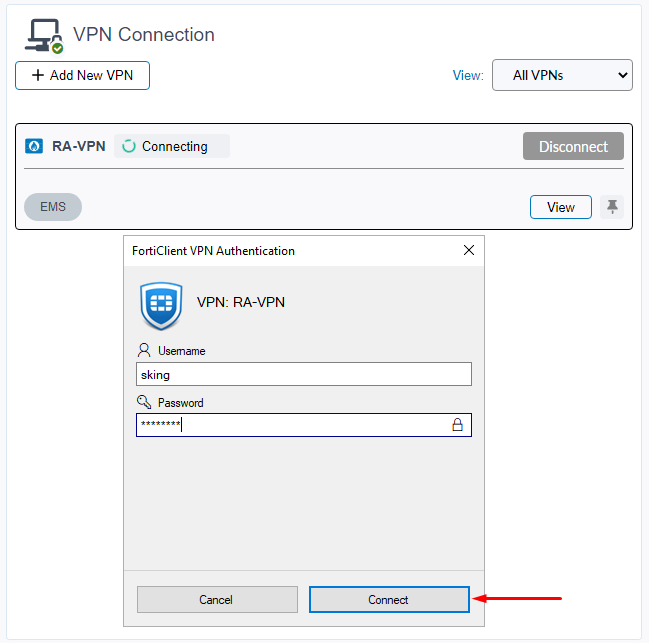
- The connection process starts, and a pop up window asking for credentials should show up. Insert valid credentials according to the user group defined in the firewall policy and click on
Connect:
- If the connection was successful, a green-white up arrow should be shown as well as other connection details: user, uptime, assigned IP, upload bytes, download bytes.
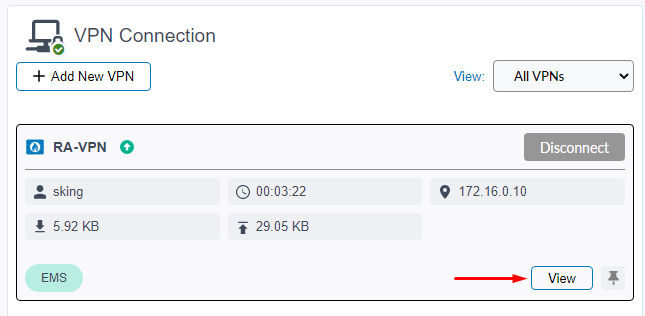
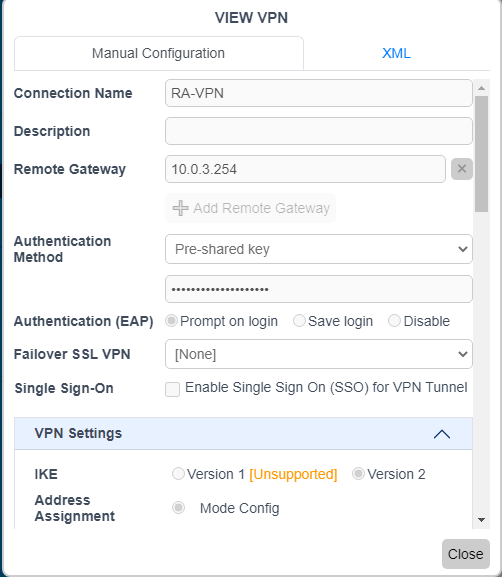
You can click on View to verify the VPN IPsec configuration received from the EMS:
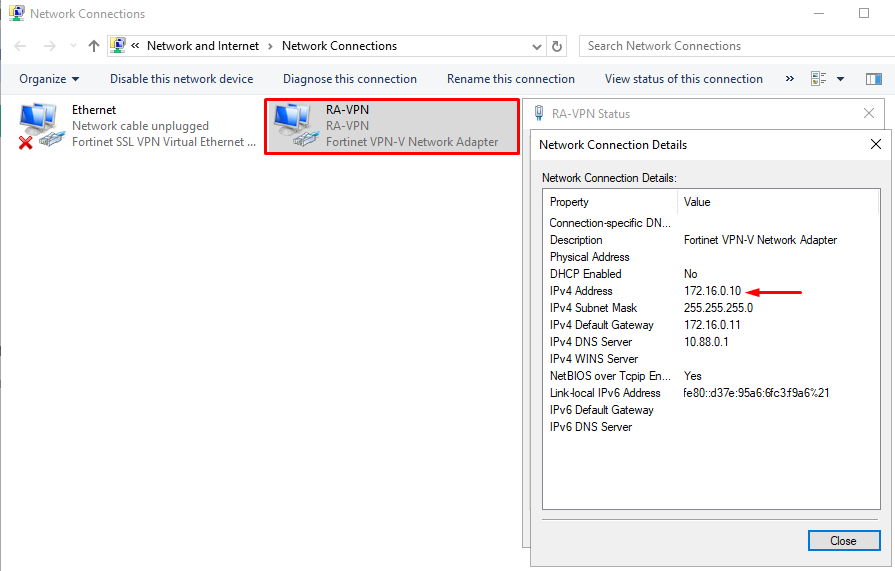
- On the endpoint you can confirm a few things:
- A new virtual interface has been created for the IPsec VPN, with an IP address assigned from the pool defined on the FortiGate IPsec:
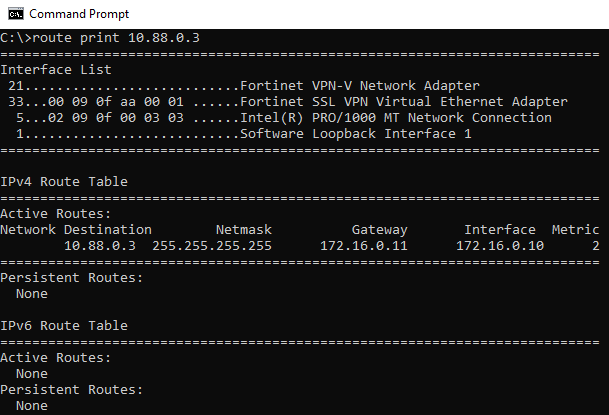
- On CLI, you can also verify a static route has been added with the destination IP defined on the firewall policy:
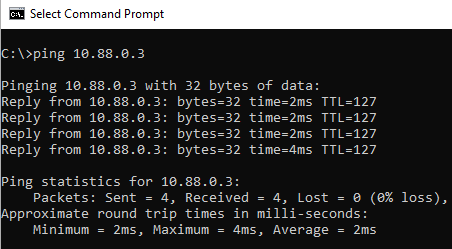
- The endpoint should have connectivity to the server via the IPsec tunnel:
Reviewing the IPsec VPN connection#
From FortiGate, verify the dialup VPN status and related logs:
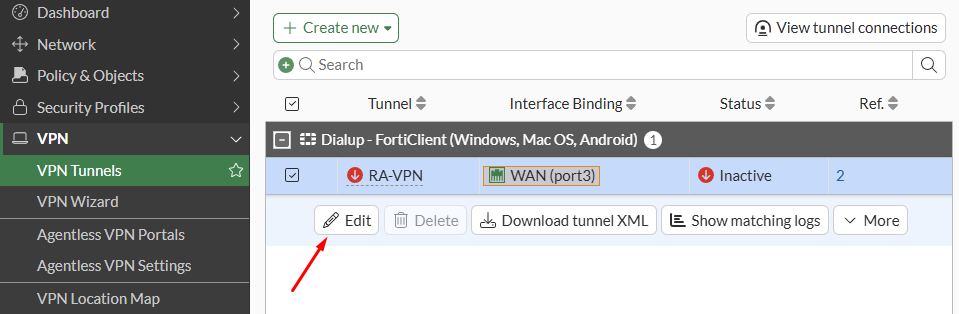
- Under
VPN > VPN Tunnels, one dialup connection exists (Statuscolumn). Select that option:
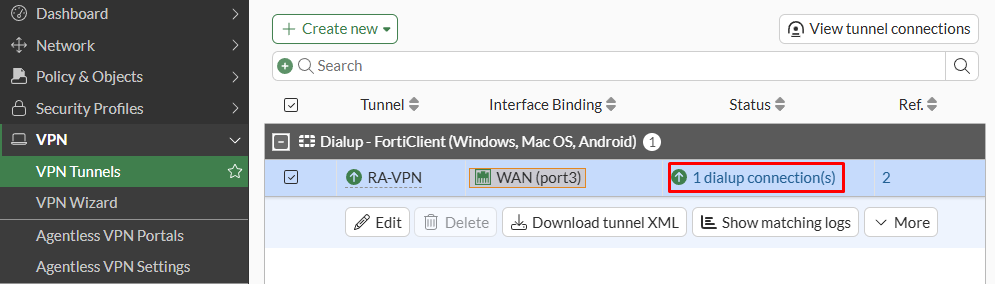
- The popup window shows the IPsec VPN connection including the remote IP address, and connected user:

- Under
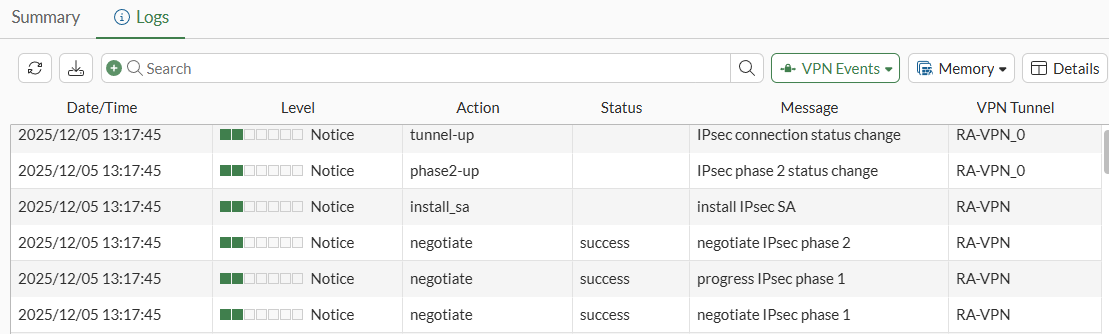
Log & Report > Forward Traffic, review the traffic logs coming from the dialup client to the local server through the IPsec tunnel:

- Under
System Events > VPN Eventsconfirm the IPsec negotiation logs: