Introduction#
FortiGate can act as a DNS server. DNS services can be enabled on a per-interface basis and working in one of the following modes:
- Recursive: in this mode, you can define DNS records in FortiGate’s DNS database. When a DNS query arrives, FortiGate first checks its local database. If the query is not found, the query is forwarded to the DNS server configured on the FortiGate under
Network > DNS. - Non-Recursive: using this mode, FortiGate only uses its own DNS database to resolve queries. If the entry is not in the database, the request will not be resolved. This means that FortiGate acts as the only DNS source, so this mode should be used with caution.
- Forward to System DNS: when this mode is selected, FortiGate functions as a DNS relay rather than a DNS server. This means that DNS queries received by FortiGate are forwarded directly to the system DNS servers configured under
Network > DNS. - Resolver (available from FortiOS v7.6.0): in this mode, FortiGate performs full DNS resolutions on its own. It contacts root name servers, Top-Level Domain (TLD) name servers , and authoritative servers directly to resolve queries. Instead of forwarding requests to external resolvers, FortiGate iterates through the DNS hierarchy to obtain the final IP address for the FQDN. This can prevent issues such as query-per-second limits imposed by external DNS providers.
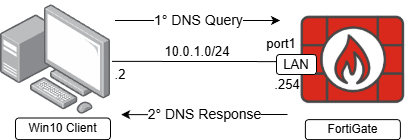
In this article, FortiGate will be configured as a DNS Server using recursive mode. DNS services will be provided on its LAN (port1) interface, including custom DNS entries and a Windows device will be configured as its DNS client, as shown in the following topology:
Configuring DNS Server Recursive Mode#
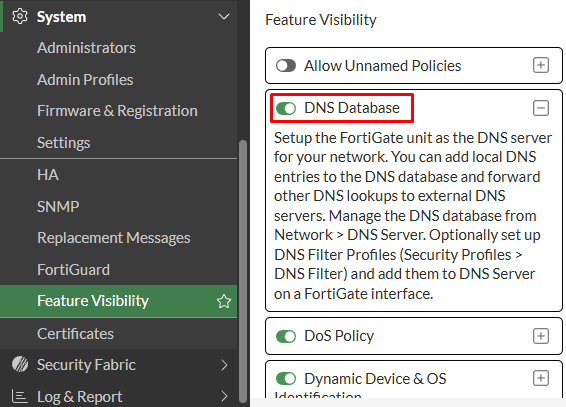
- Start by enabling the
DNS Databasefeature visibility on FortiGate GUI underSystem > Feature visibility:
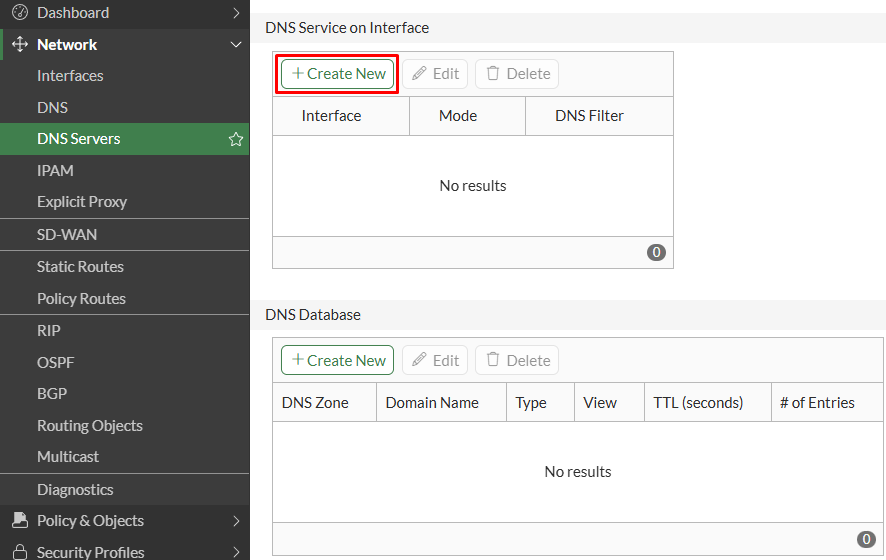
- Next, move on to
Network > DNS Servers. UnderDNS Service on Interfacesection, click onCreate New:
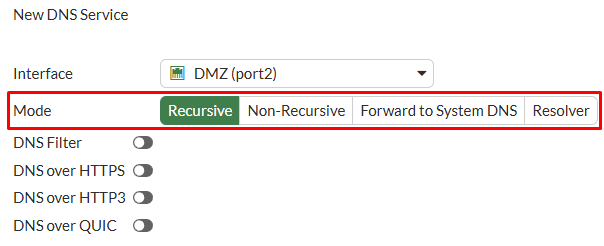
- Select the
Interfacethat will be listening for DNS queries and the workingMode, which will be set toRecursivein this case:
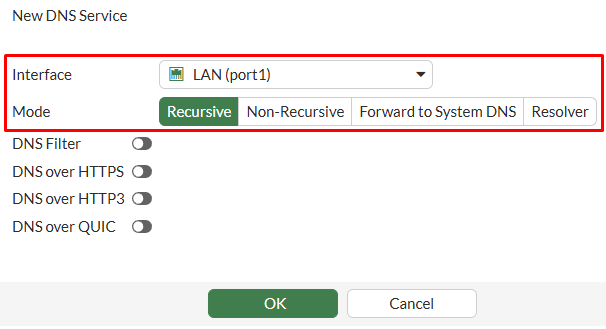
Since the FortiGate LAN1 (port1) interface will be working as a DNS Server in Recursive mode, incoming DNS requests will try to be resolved using its own DNS database. If FortiGate doesn’t found any related record, the request will be redirected to the DNS Server configured under Network > DNS.
- Click
OKto save changes.
The complete equivalent CLI configuration is as follows:
config system dns-server
    edit "port1"
        set mode recursive
        set dnsfilter-profile ''
        set doh disable
        set doh3 disable
        set doq disable
    next
end
Configuring a DNS Zone#
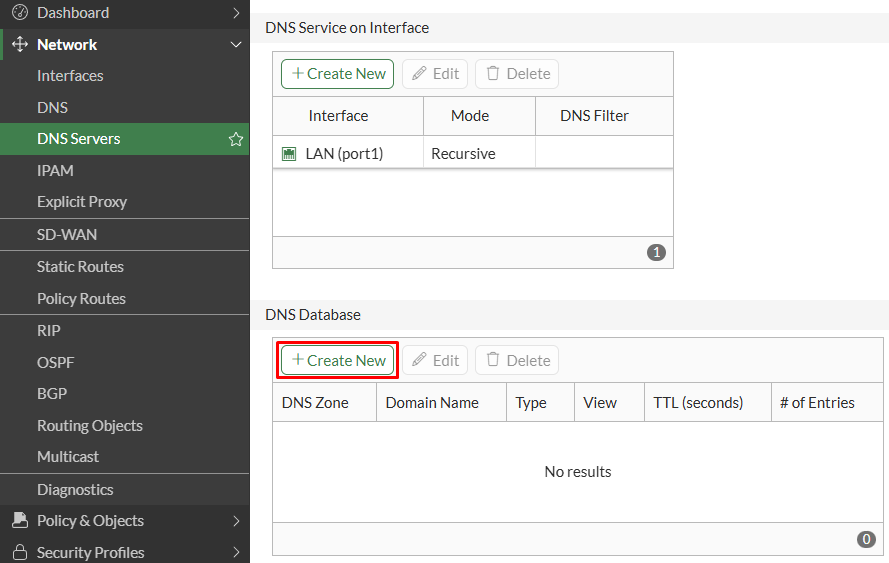
DNS Service is now enabled on the selected interface. Under DNS Database, you can optionally create a custom DNS zone where you can manage DNS records of a domain.
- Go to
Network > DNS Servers, under DNS Database section, clickCreate Newto configure a new DNS Zone:
- Set the following parameters for the DNS Zone:
| Parameter | Value |
|---|---|
| Type | Primary (default) |
| View | Shadow (default) |
| DNS Zone | configure your custom DNS zone |
| Domain | configure your custom domain name |
| Hostname of Primary DNS | dns (default) |
| Contact Email Address | host (default) |
| TTL | Set the TTL for records in the current zone. This value can be overridden on each DNS entry. |
| Authoritative | enabled |
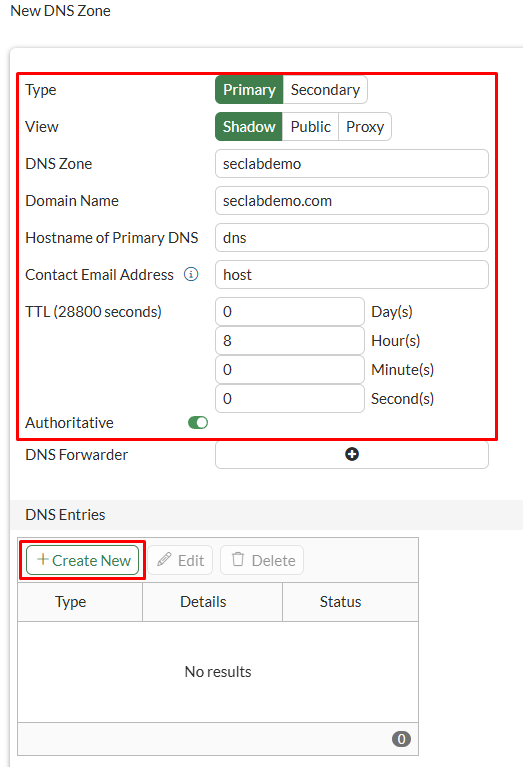
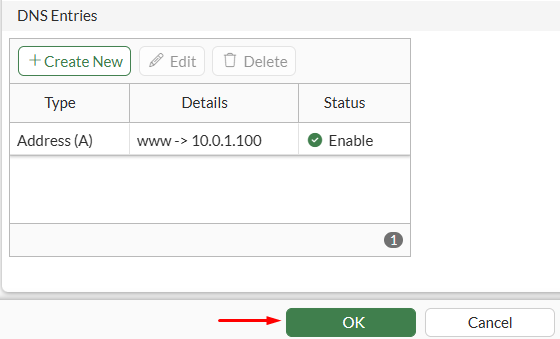
- Under
DNS Entriessection, click onCreate Newand configure the DNS record settings:
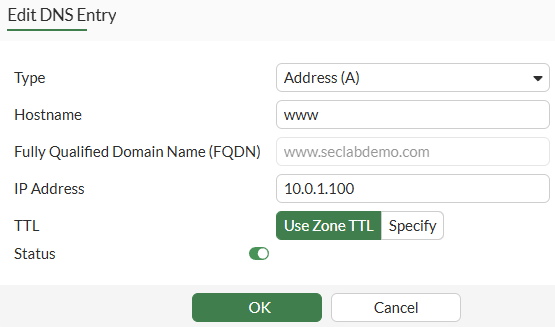
| Parameter | Value |
|---|---|
| Type | Address (A) |
| Hostname | www |
| FQDN | www.seclabdemo.com |
| IP address | 10.0.1.100 |
| TTL | Use Zone TTL |
| Status | enabled |
- Select
OKand verify the DNS entry is listed, then clickOKagain:
- Verify the DNS database has the custom DNS Zone created with one entry associated:
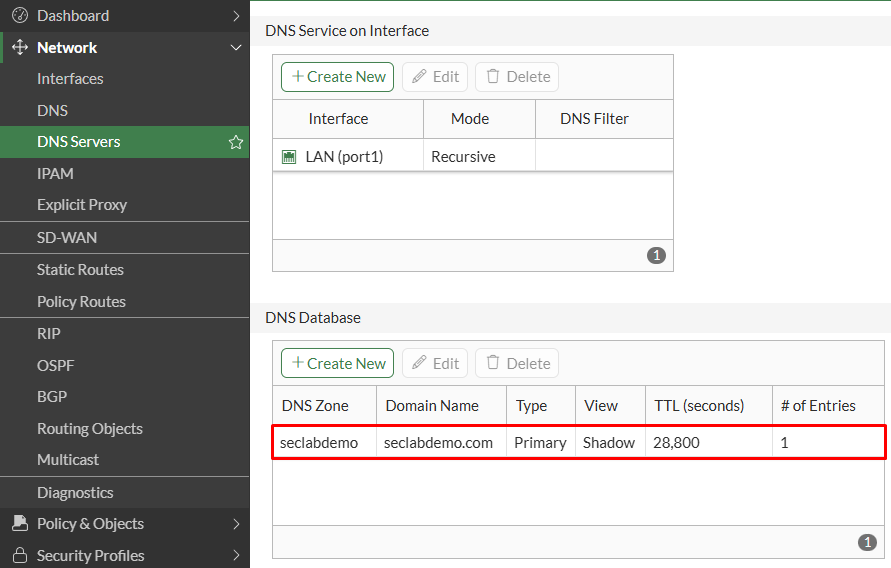
The equivalent CLI configuration is as follows:
config system dns-database
    edit "seclabdemo"
        set domain "seclabdemo.com"
        set ttl 28800
        config dns-entry
            edit 1
                set hostname "www"
                set ip 10.0.1.100
            next
        end
    next
end
Testing DNS Services#
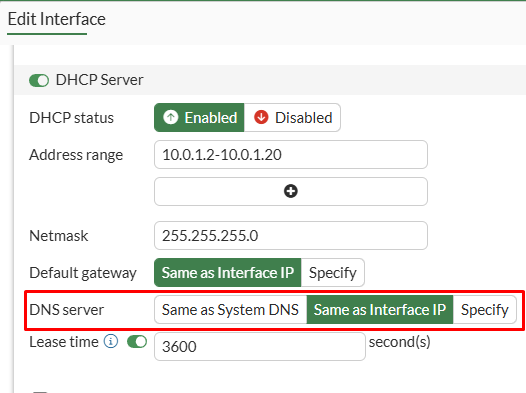
If the FortiGate interface that will work as a DNS server has DHCP services enabled, you can set the DNS server to Same as Interface IP if you want configure users with FortiGate interface IP address as the DNS server via DHCP:
Network > Interface
From the Windows client, once it receives the DHCP configuration, the DNS server will be set to FortiGate’s interface IP address. Afterwards, the following tests are done from the Windows client:
- A DNS lookup for the FQDN record www.seclabdemo.com created on the DNS database:
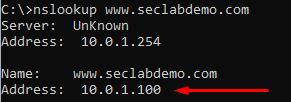
The client sends the DNS query to FortiGate’s interface and it’s resolved to 10.0.1.100 IP address. This matches the “A” record created in FortiGate’s DNS database.
- A DNS lookup for google.com:
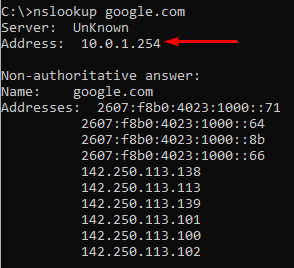
The client sends the DNS query to FortiGate’s interface and it’s resolved, as FortiGate is working as a recursive DNS server.